Regroup Accounts
FinBoard lets you regroup and rename accounts without changing your QuickBooks chart of accounts. Your books stay exactly as your accountant left them, while your reports are shaped for whoever is reading them.
You can keep more than one mapping per company. A board pack, a lender pack and an internal management view can each have their own structure, built over the same underlying ledger. You pick which one to apply when you run a report.
Where to find it
The screen is the same for every company; only the name in the sidebar changes:
- Single entity — the sidebar shows Regroup
- Multi-entity group — the sidebar shows Consolidation
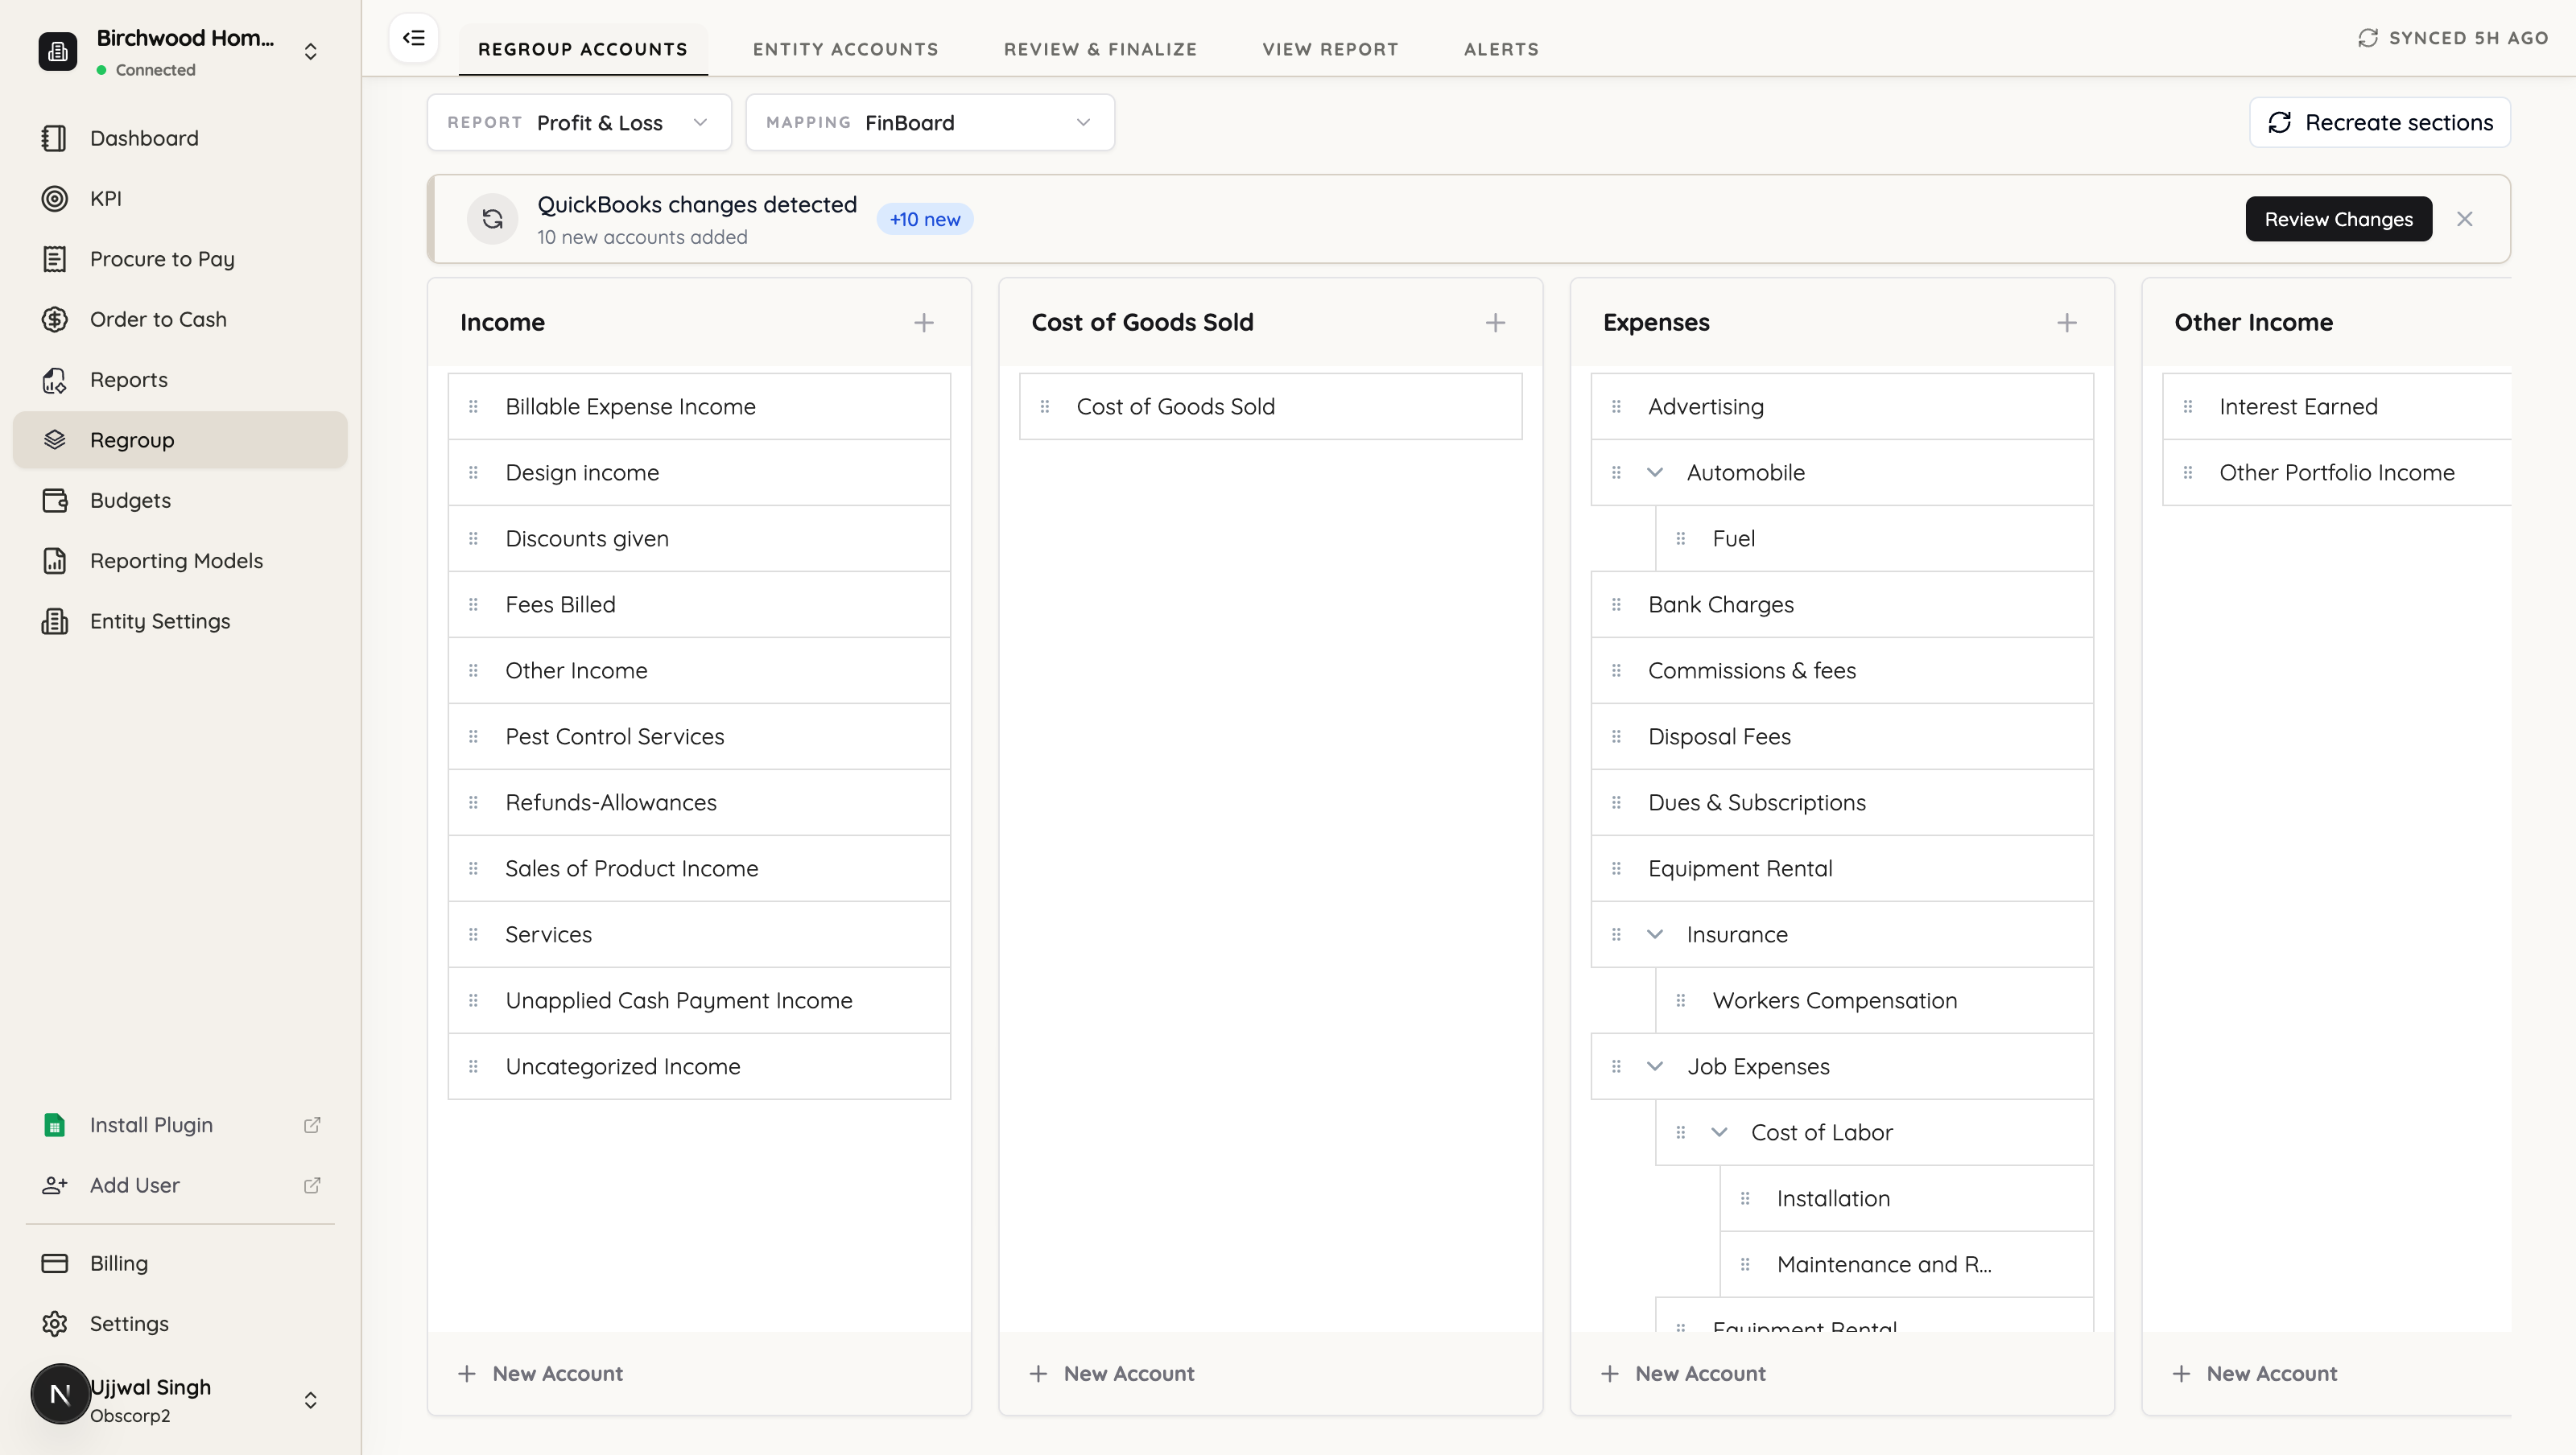
Open it and you’ll see two selectors at the top of the page: Report (Profit & Loss, Balance Sheet, Cash Flow) and Mapping. A multi-entity group adds a Budget Accounts tab and an Eliminate column for intercompany accounts; everything else works the same way.
Choose or create a mapping
The Mapping dropdown lists every mapping saved for this company, with the active one marked. This is where you switch between audiences.
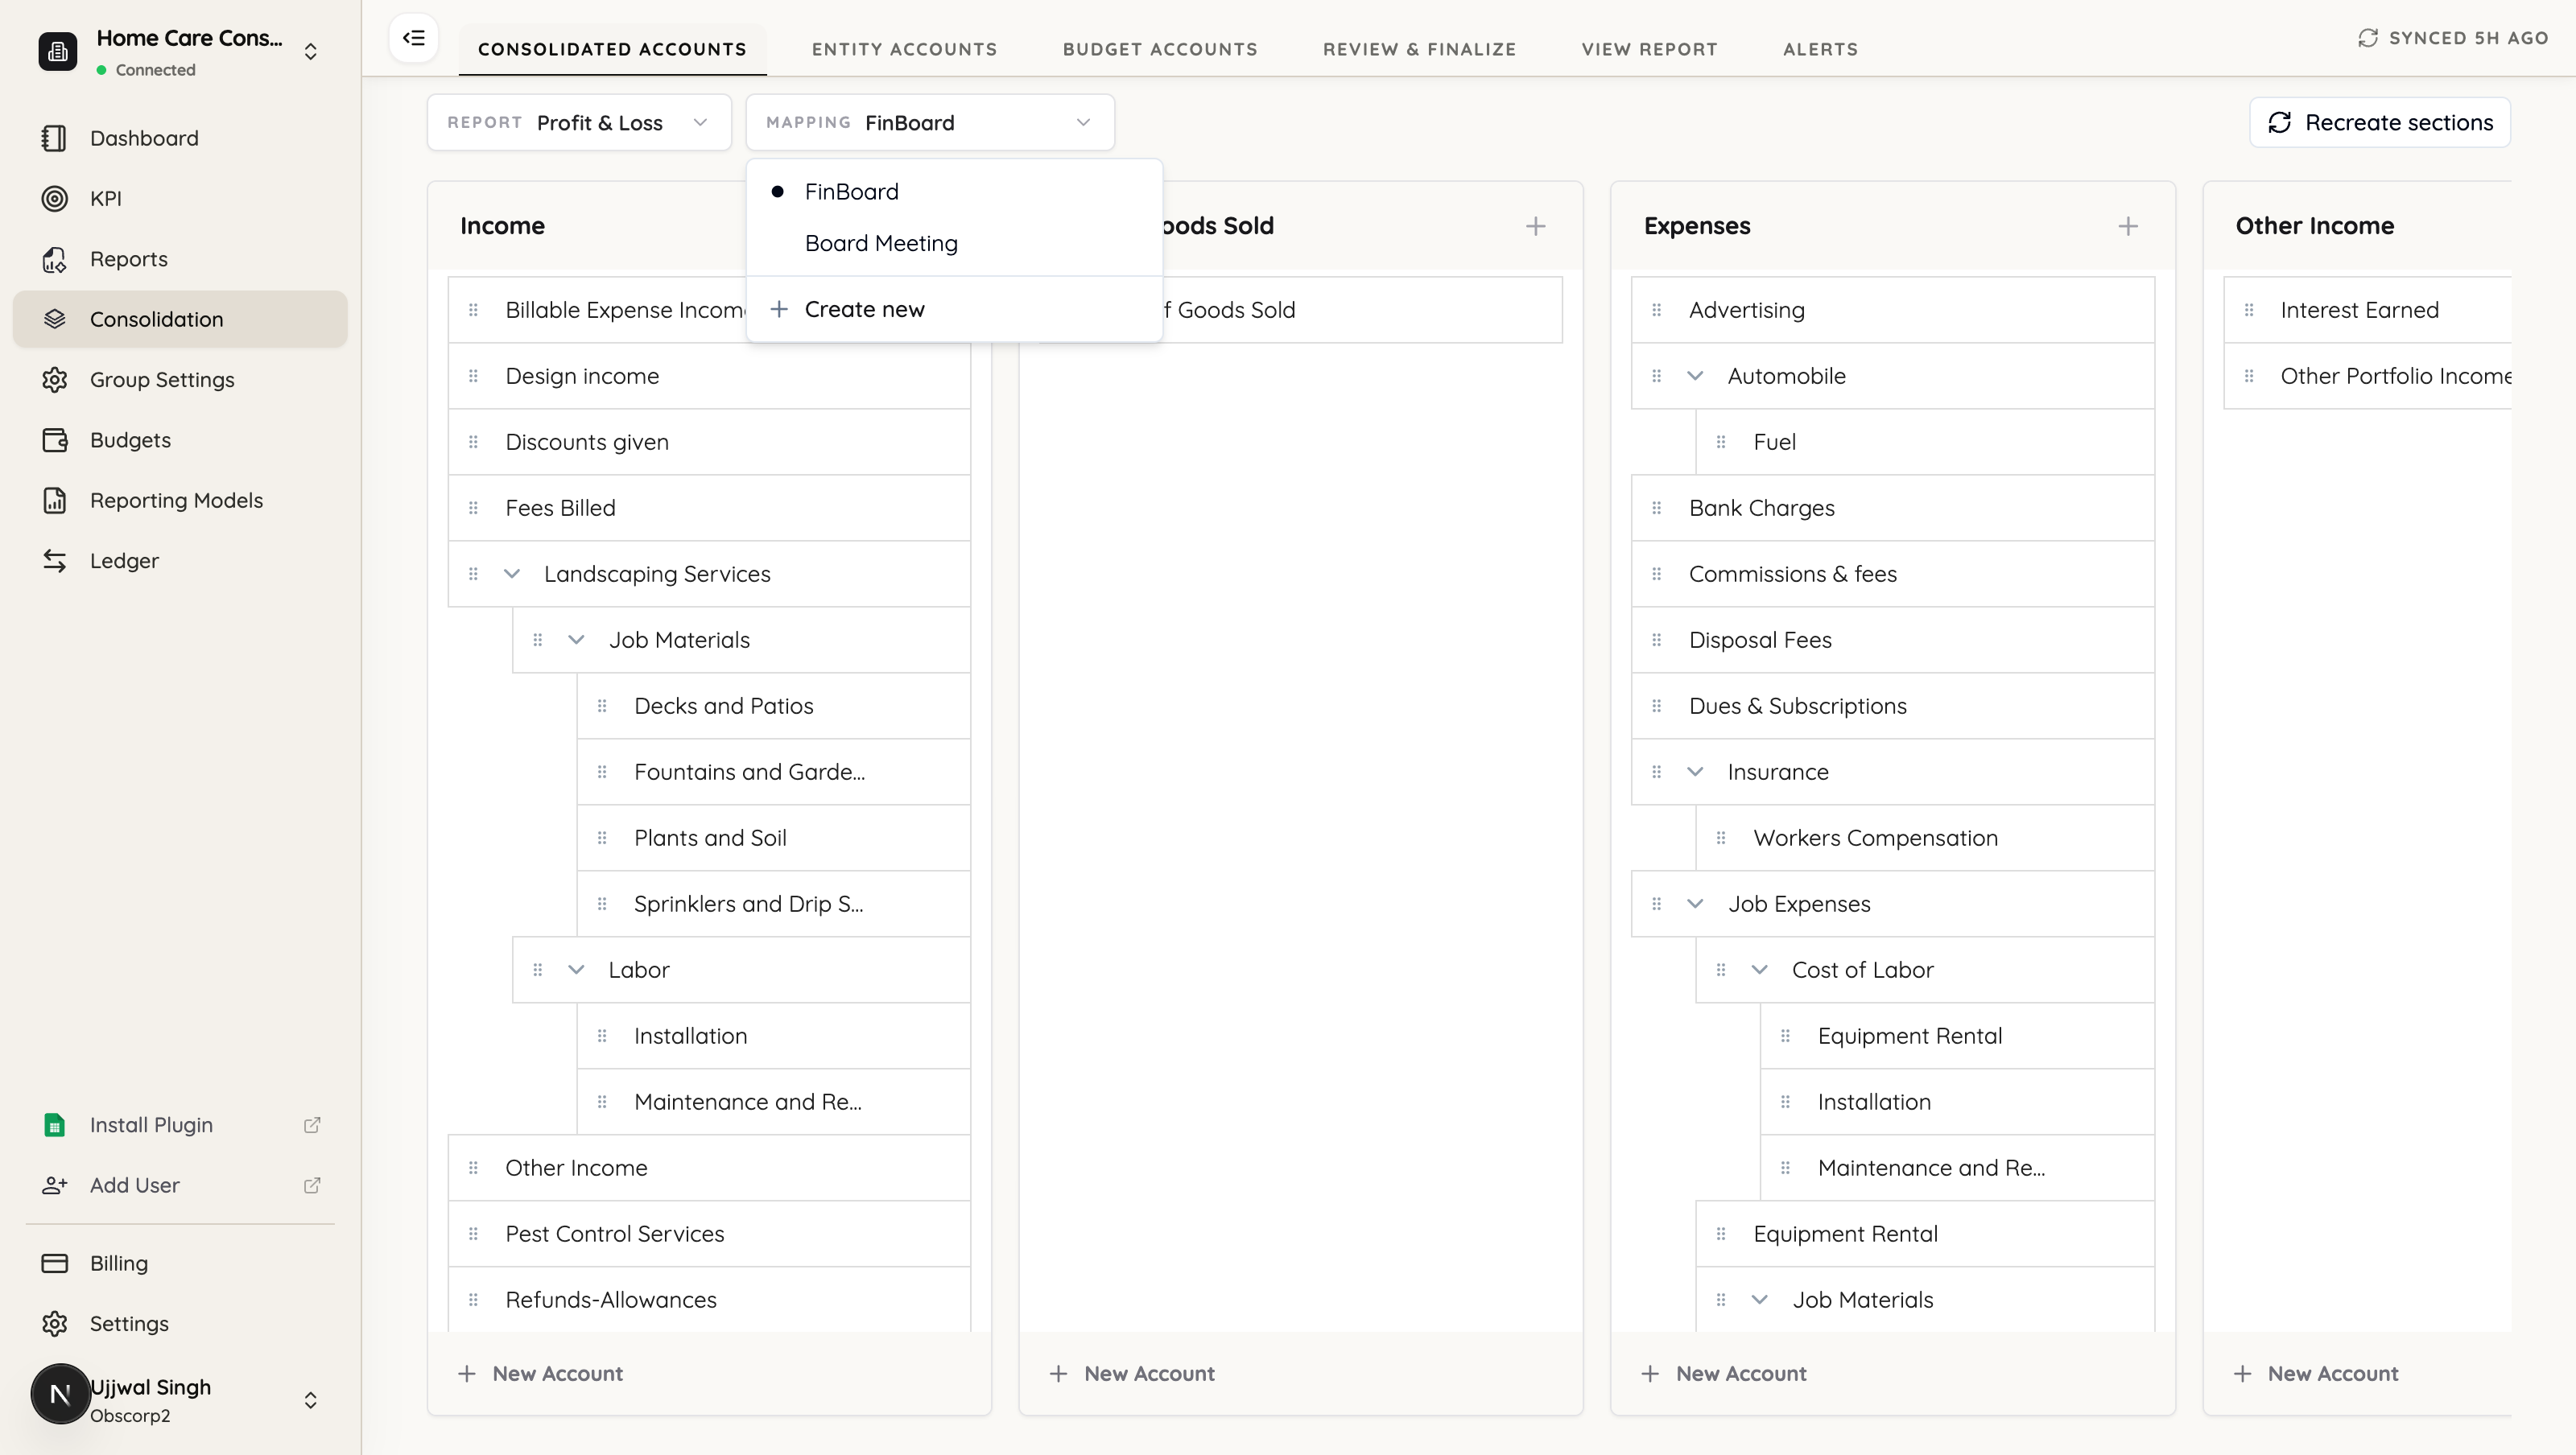
Every company starts with one mapping named FinBoard. To add another, choose Create new.
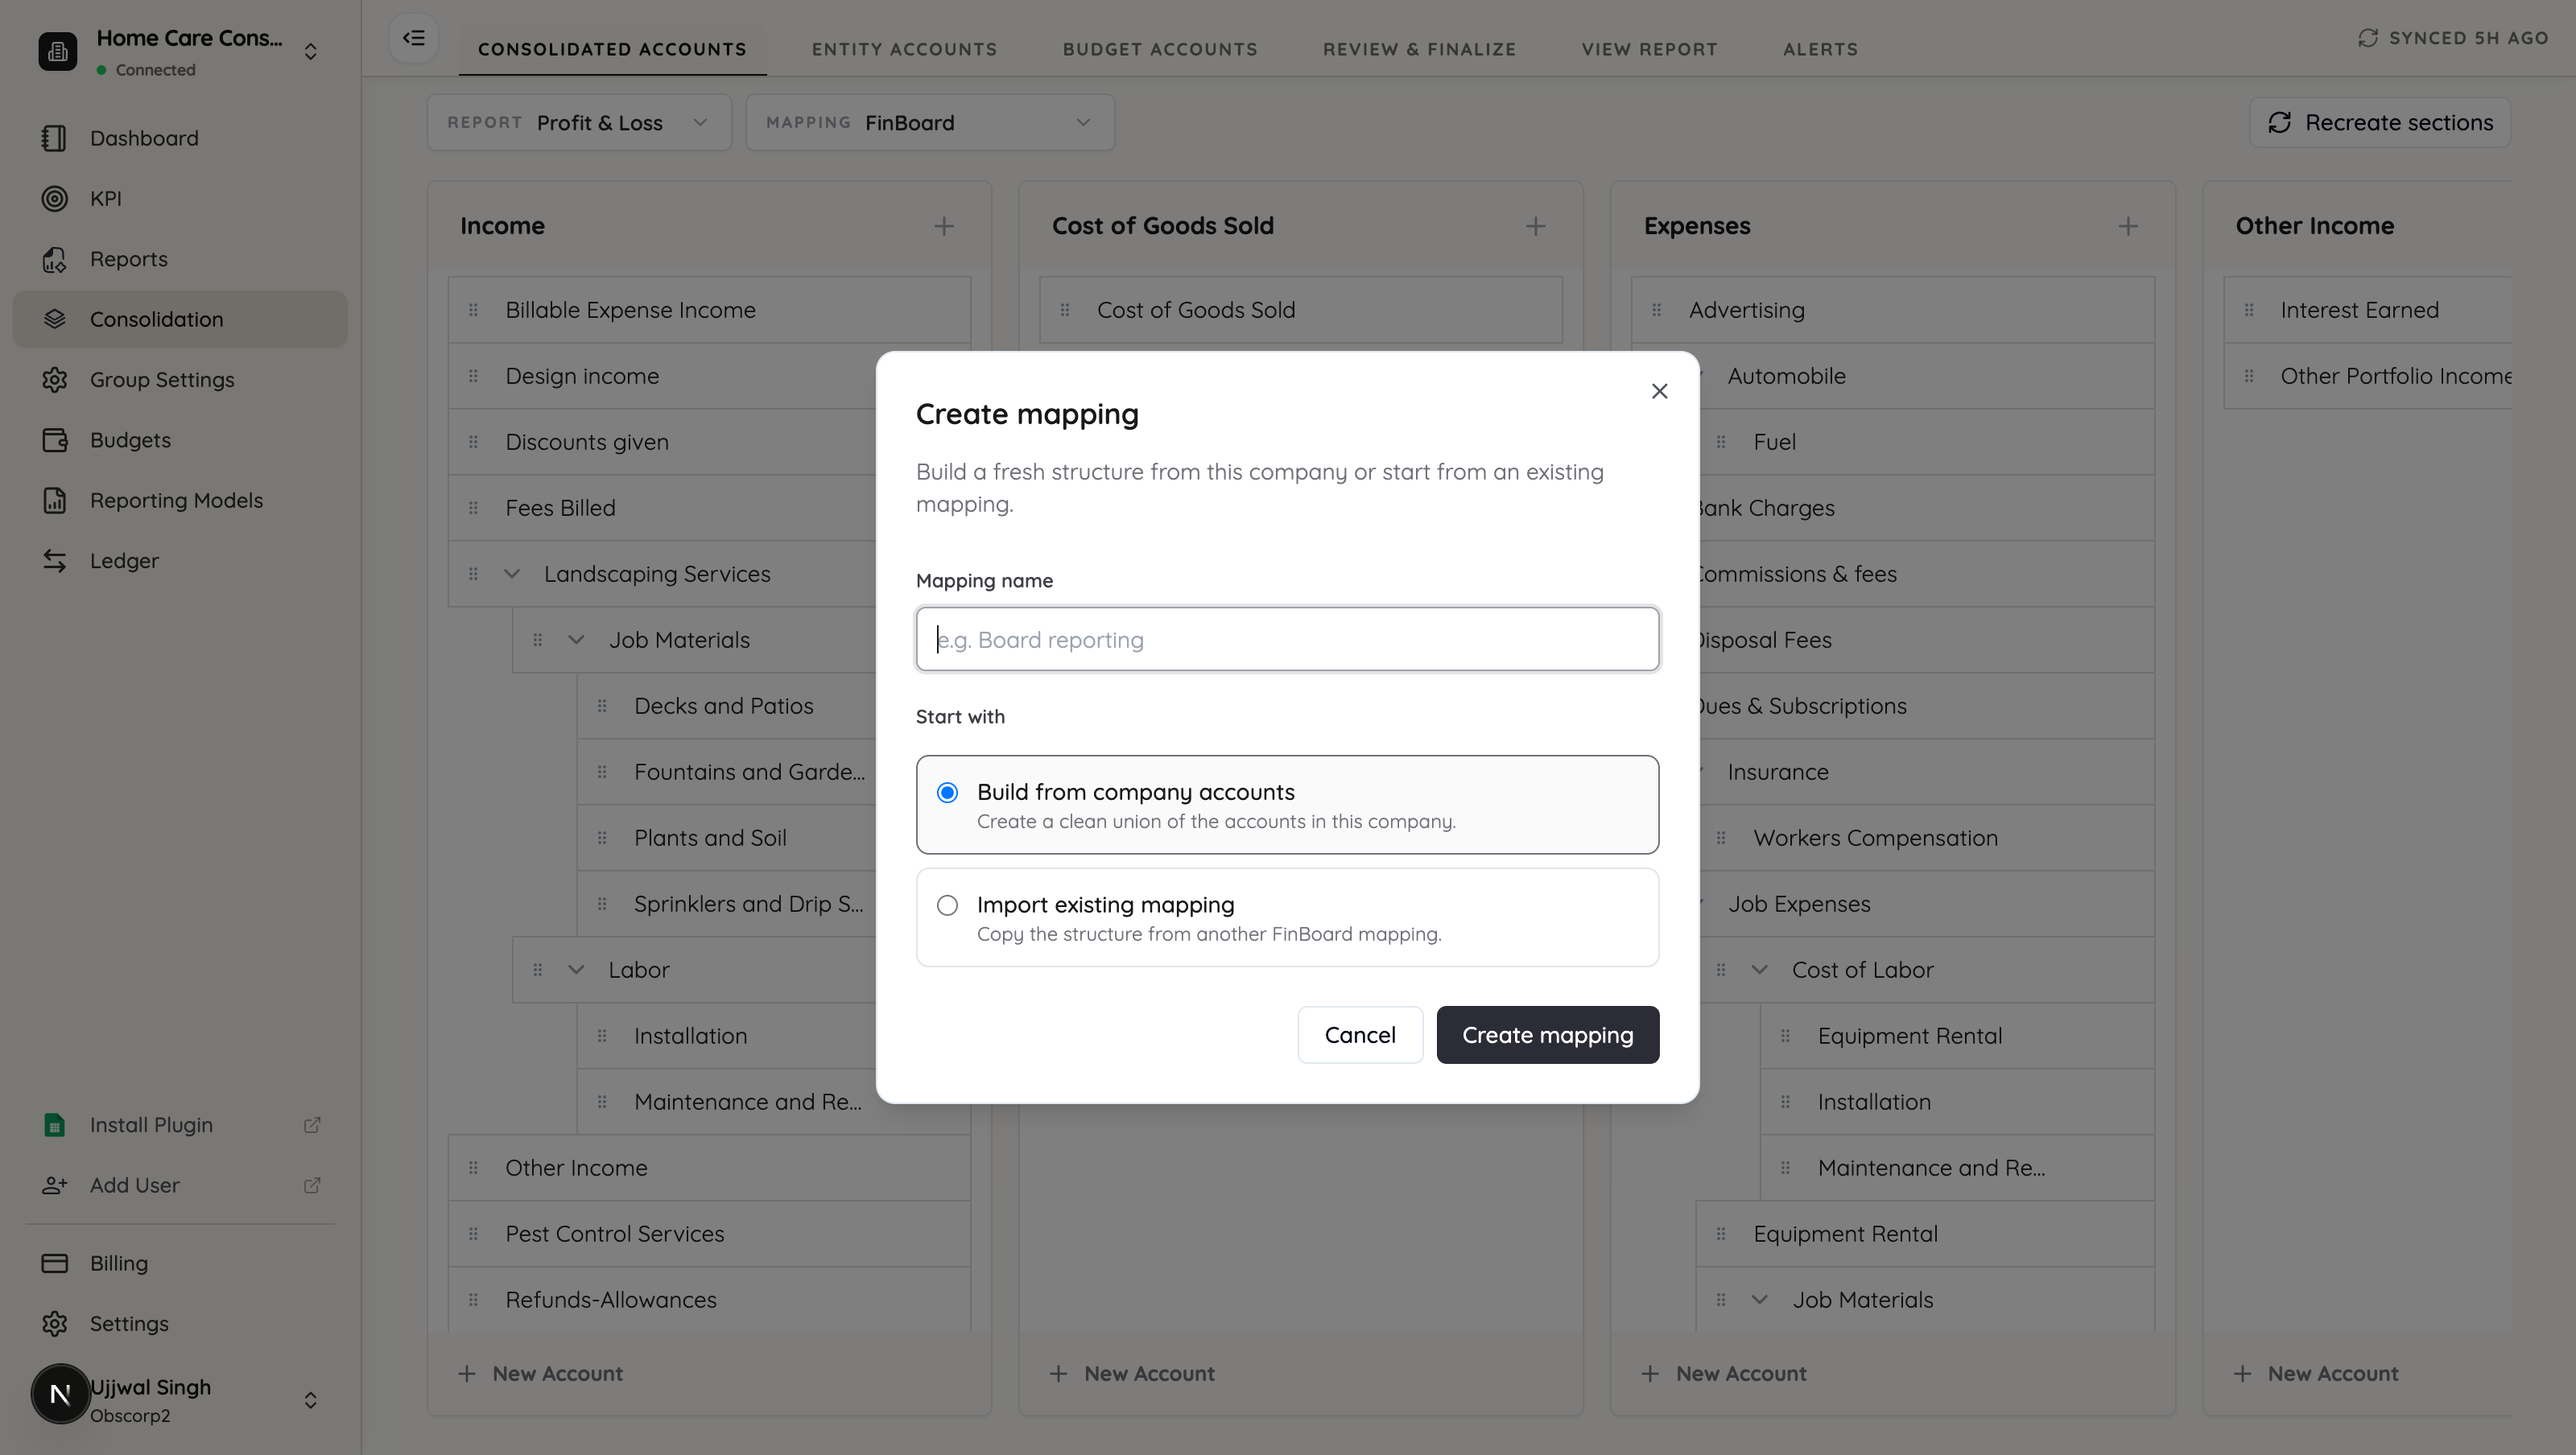
Give the mapping a name your team will recognise — Board Meeting, Lender Pack, CFO Review — then choose how to start it:
- Build from company accounts — creates a clean structure from the accounts in this company. Use this when the new view is genuinely different from anything you already have.
- Import existing mapping — copies the structure from another FinBoard mapping. Use this when the new view is a variation on one you have already built, so you only adjust what differs.
Mappings are independent. Editing the board view never changes the management view, and each one keeps its own groups and its own account assignments.
Step 1 — Create groups
On the Consolidated Accounts tab, define the reporting hierarchy you want to see in the statement.
- Use + on a section, or New Account at the bottom of a column, to add a group.
- Drag accounts to reorder them and to nest them into parent-child hierarchies.
- Rename anything to language your audience uses rather than the QuickBooks name.
Work through each statement separately by switching the Report selector between Profit & Loss, Balance Sheet and Cash Flow. The Mapping selector stays on whichever mapping you are editing.
Step 2 — Map accounts
Move to the Entity Accounts tab. This is where each QuickBooks account is pointed at a group you created in Step 1.
What can be grouped?
Groups organise accounts with the same reporting direction. Income and Other Income can be grouped together. On the expense side, Cost of Goods Sold, Expenses, and Other Expenses can be grouped together.
Do not put income and expense accounts on the same ordinary mapped line. If you need a measure that combines both sides — for example, Product Contribution — calculate it with a Google Sheets formula or use a FinBoard-configured KPI. See Add calculated lines and formulas to a FinBoard report and the worked custom monthly P&L.
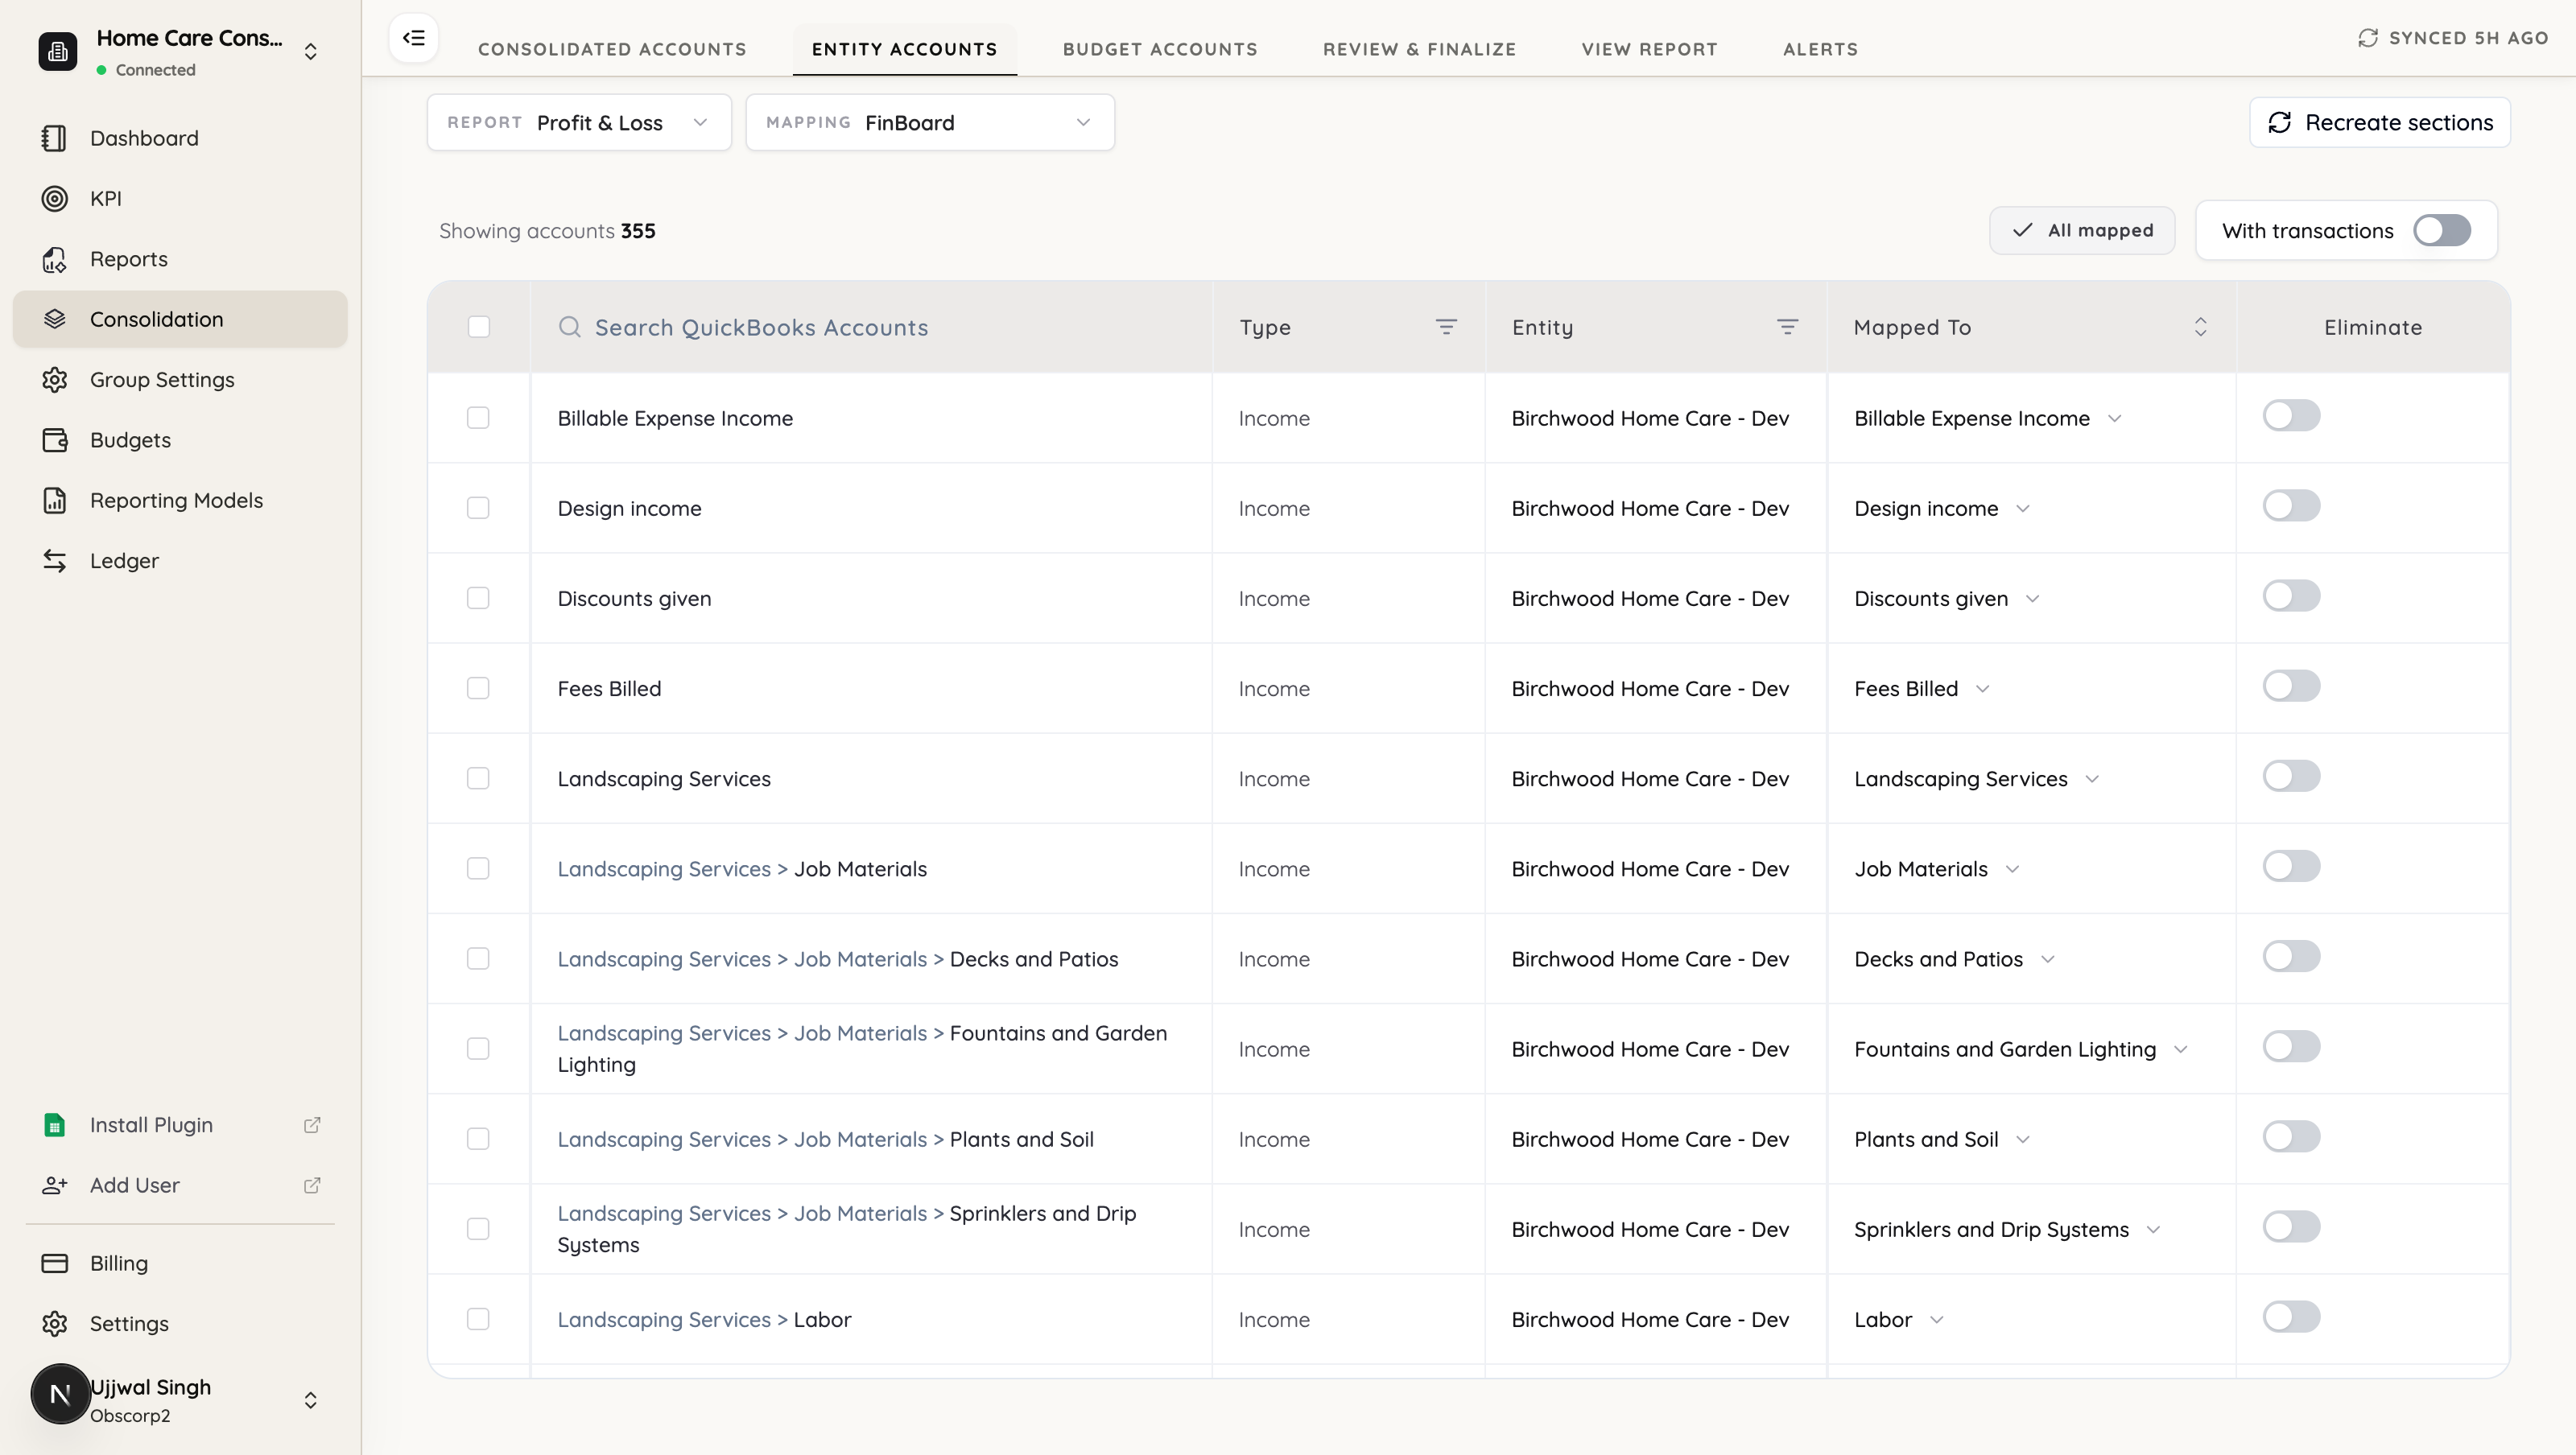
The first column lists your QuickBooks accounts; Mapped To shows the group each one currently feeds.
- Search by account name, or filter by Type and Entity, to narrow a long list.
- Select several accounts with the checkboxes and map them together when they all belong in one group.
- All mapped shows whether anything is still unassigned. Turn on With transactions to hide dormant accounts and focus on the ones that actually carry balances.
- For a consolidated group, use Eliminate to exclude accounts that carry intercompany transactions.
An account can map to a different group in each mapping. That is the whole point: the same expense account might sit under Operating Costs for the board and under a more detailed heading for internal review.
Step 3 — Review and finalise
Open Review & Finalize to check the finished structure and its links back to the QuickBooks entities, then View Report to see the statement as it will be produced.
If you change your chart of accounts in QuickBooks later, there are two ways to bring those accounts in — see When QuickBooks accounts change.
Next
- For a worked example, see Detailed and summary versions of the same report — one consolidation presented account-by-account for accounting and rolled up for leadership.
- With the mapping built, apply it when you create a report — see Apply mapping in reports.