Apply mapping in reports
Once you have built a mapping, you choose which one a report uses at the moment you create it. That is what lets a single company produce a board pack and a detailed management pack from the same ledger, without maintaining two sets of books.
Create a report with a mapping
- Open a Google Sheet and launch the FinBoard extension.
- Click Create Report.
- Pick the Company and the report you want — Profit and Loss, Balance Sheet, or Statement of Cash Flows.
- Set the Report Period and Display Column By as usual.
- Open the Apply Mapping dropdown and choose the mapping to build the report with.
- Click Create Report.
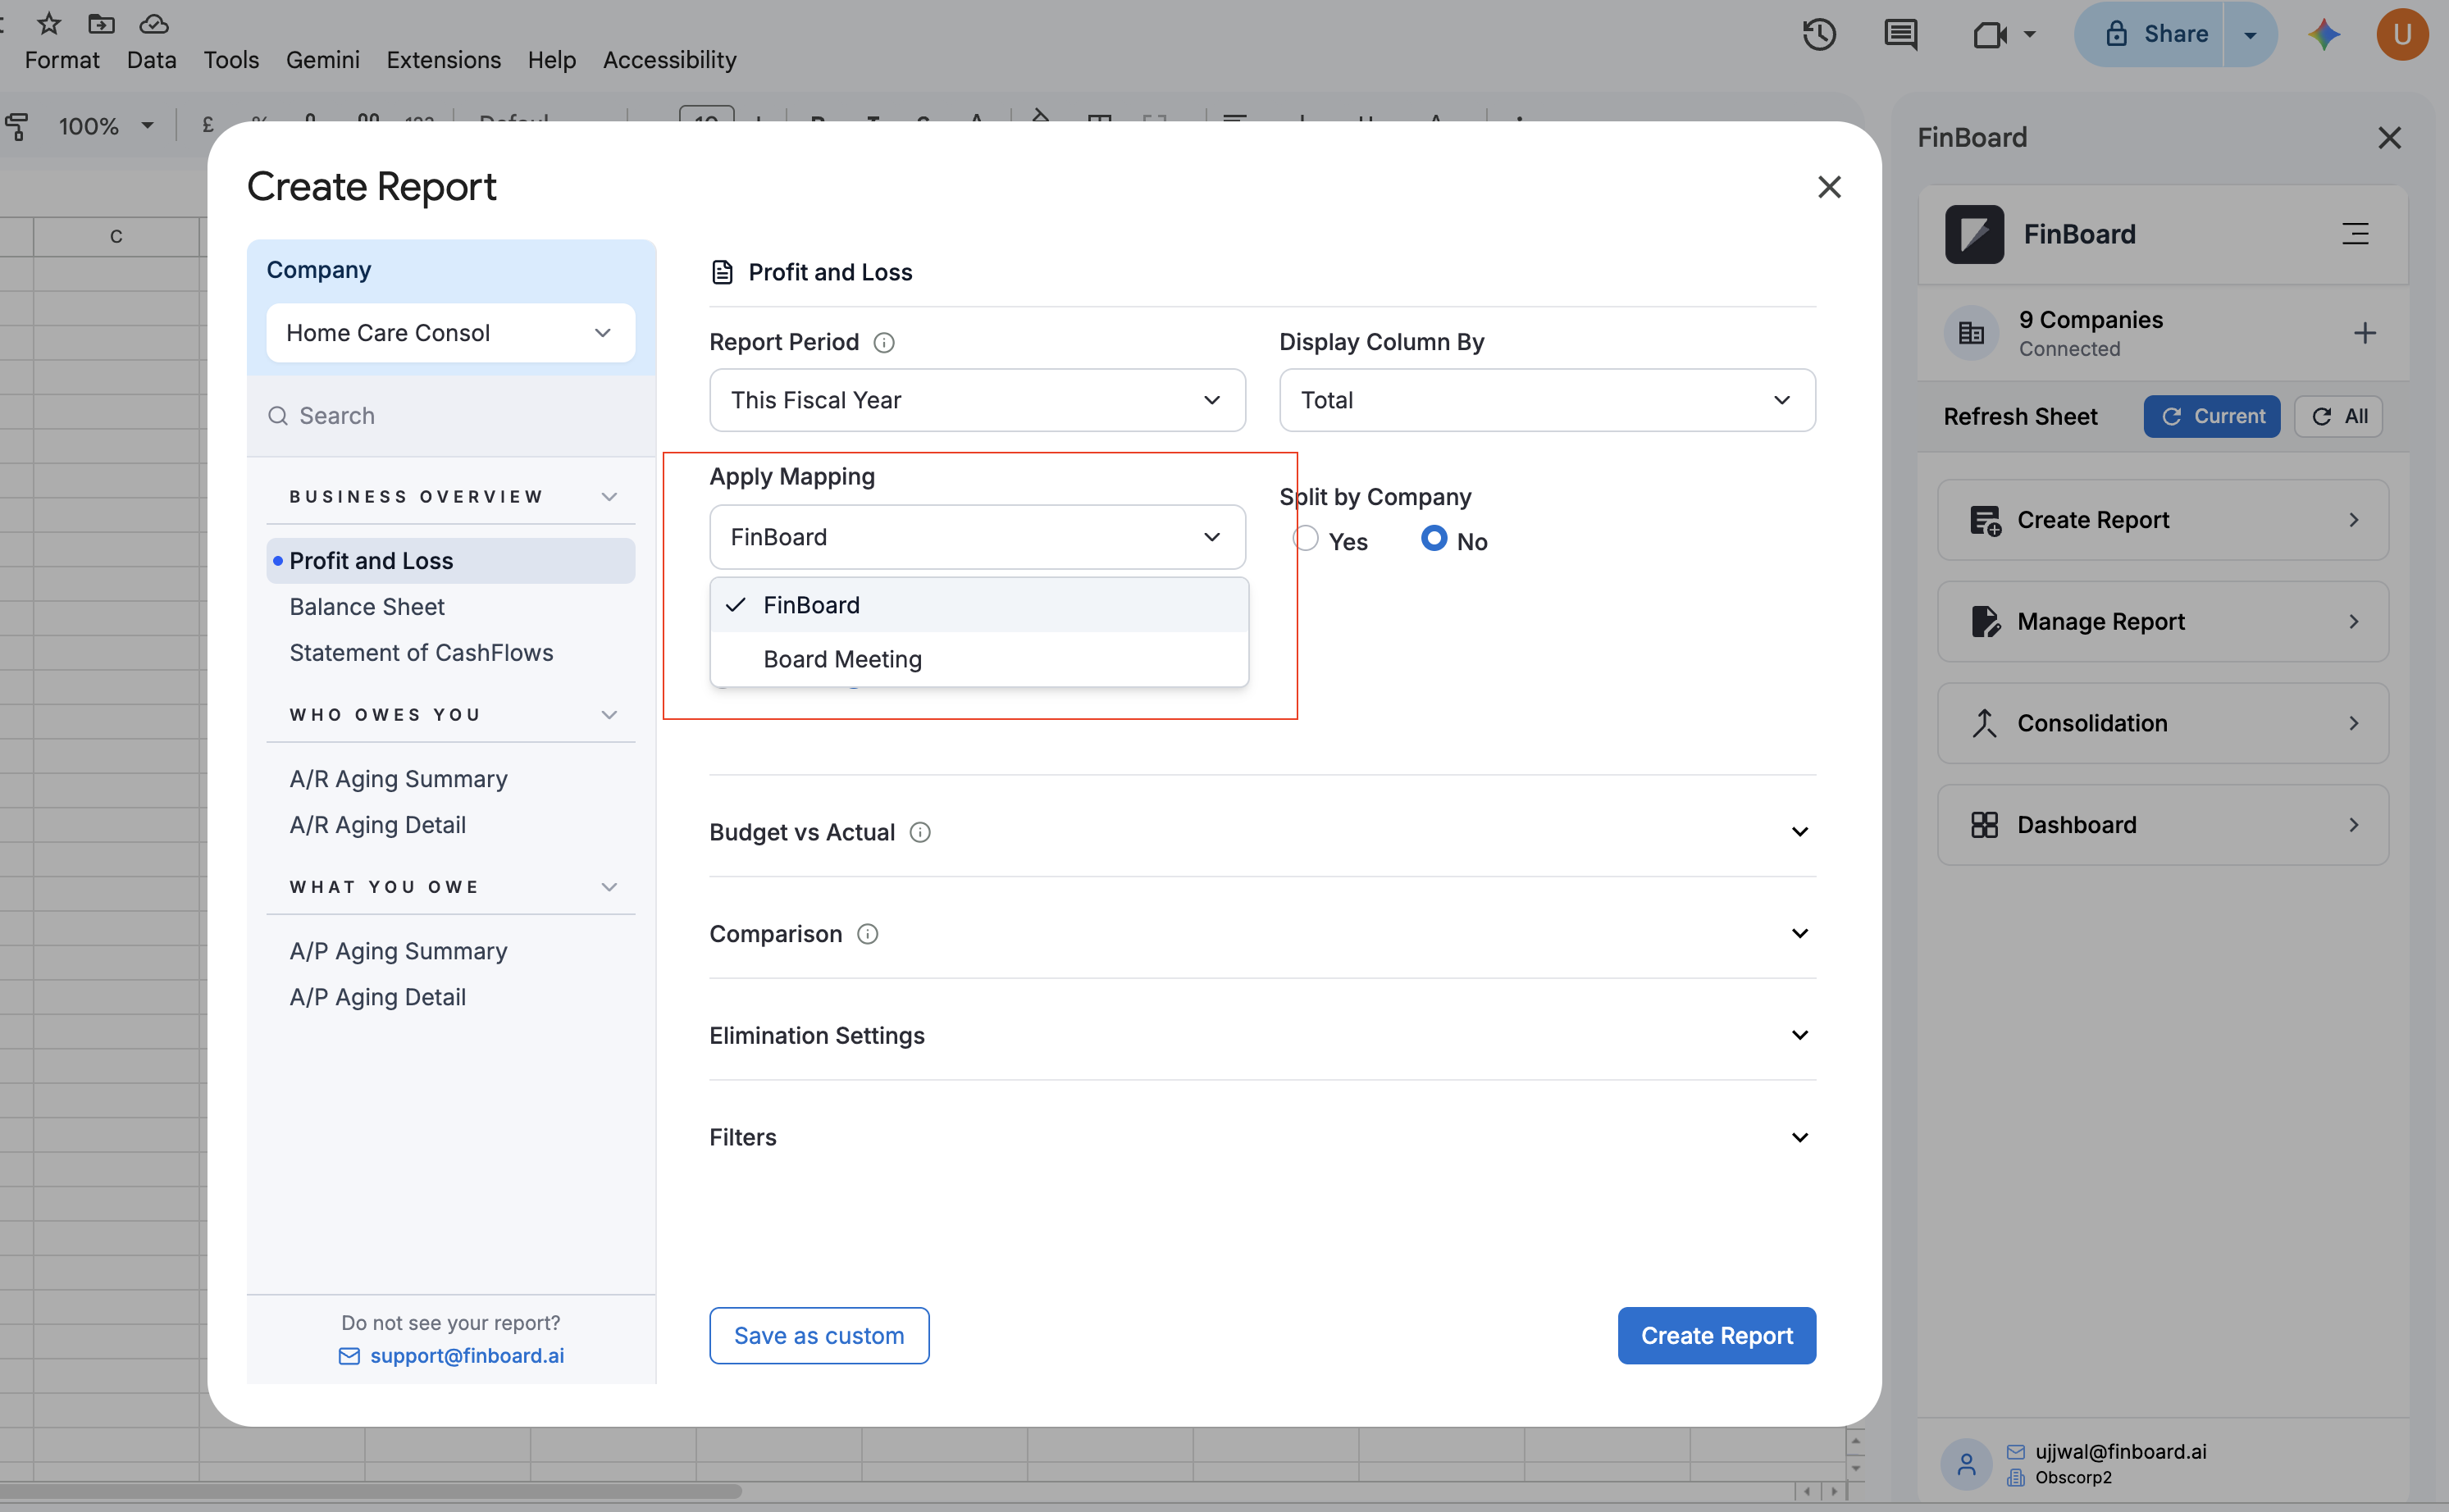
The dropdown lists every mapping saved for the selected company, with the one currently in use ticked. In the example above the company has two: FinBoard, the default structure, and Board Meeting, a version shaped for the board.
The report is then generated against that structure — your groups, your names, your hierarchy — rather than the raw QuickBooks chart of accounts.
Producing several versions
To give different audiences their own view, create the report more than once and pick a different mapping each time. Everything else — company, period, columns — can stay identical, so the numbers reconcile to the same ledger while the presentation changes.
Because the mapping is chosen per report, an existing report keeps the mapping it was created with. Refreshing it will not silently switch structures.
If the dropdown is empty or missing a mapping
The list is populated from the mappings saved for the selected company. If one you expect is not there:
- Confirm the correct Company is selected in the dialog. Mappings belong to a company, and a consolidated group has its own separate from its member entities.
- Check the mapping exists under Regroup (single entity) or Consolidation (multi-entity group) in the web app.
- If you created it moments ago, reopen the plugin so it picks up the new list.
See Regroup Accounts for how to build and name a mapping.