Custom Calendar for 4-4-5 reporting
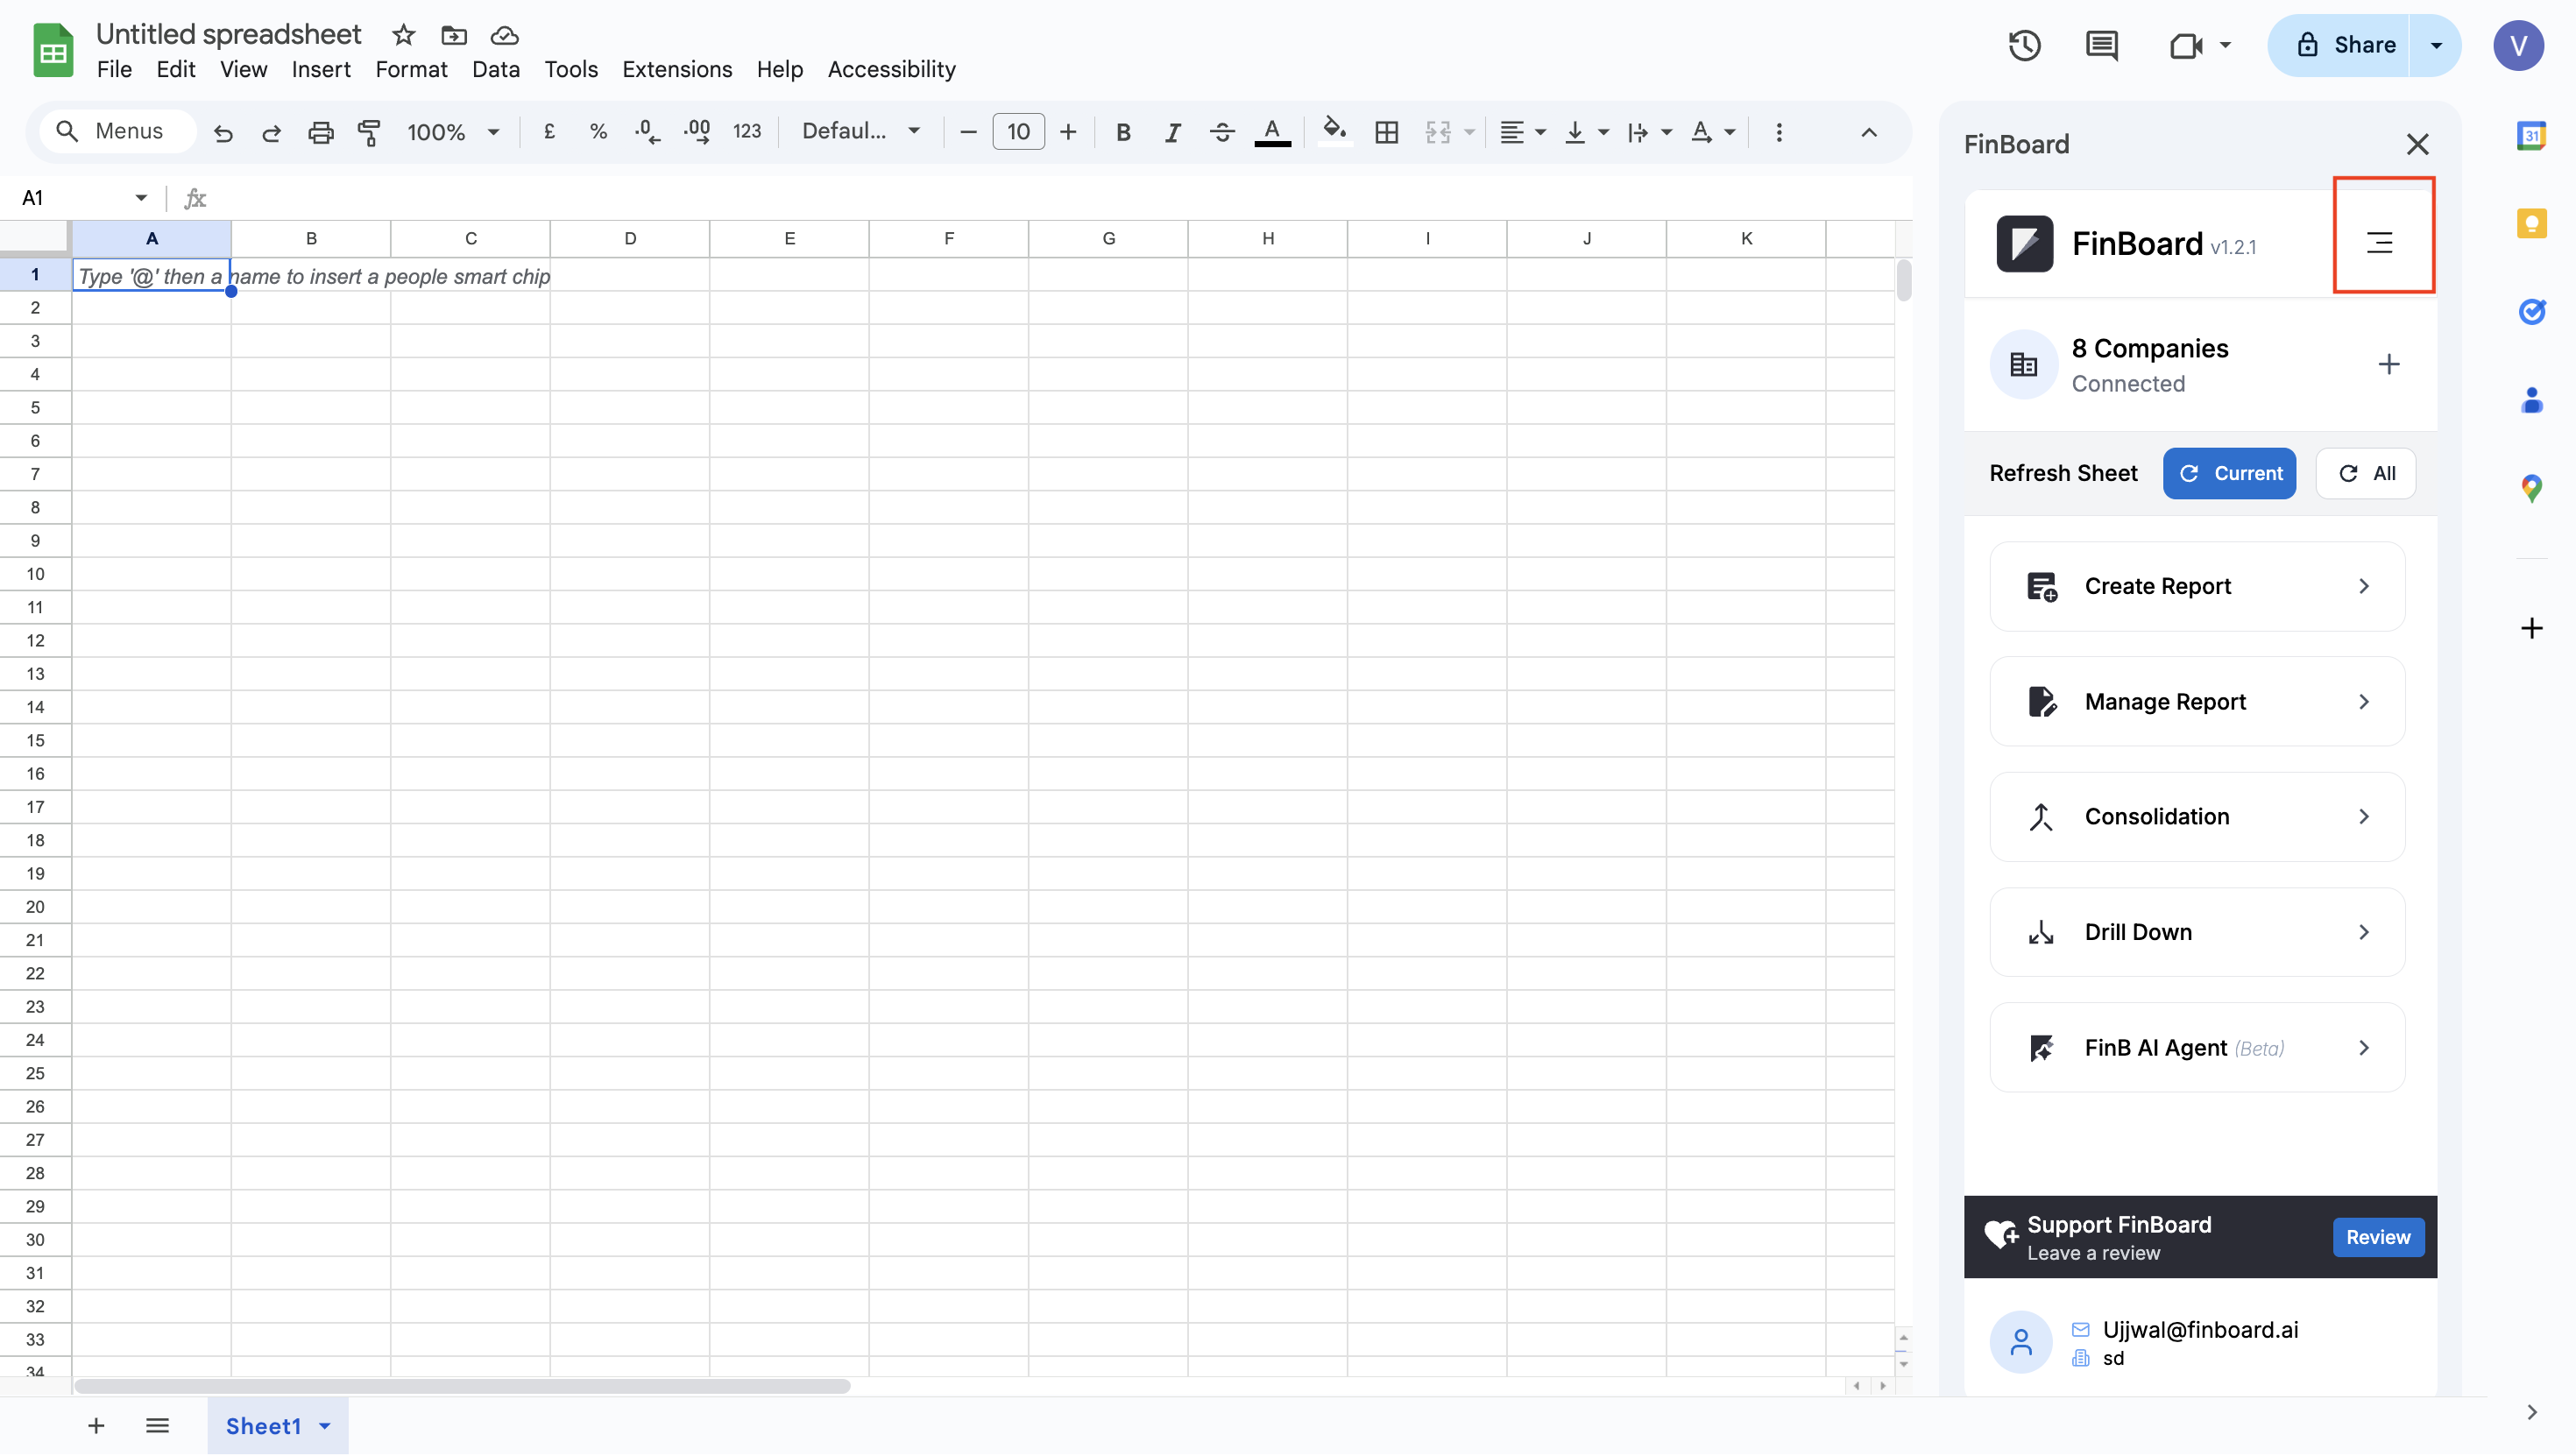
Step 1 — Open the FinBoard extension
-
Install the FinBoard Chrome extension (if not already installed).
-
Open the extension and click the menu (top right).
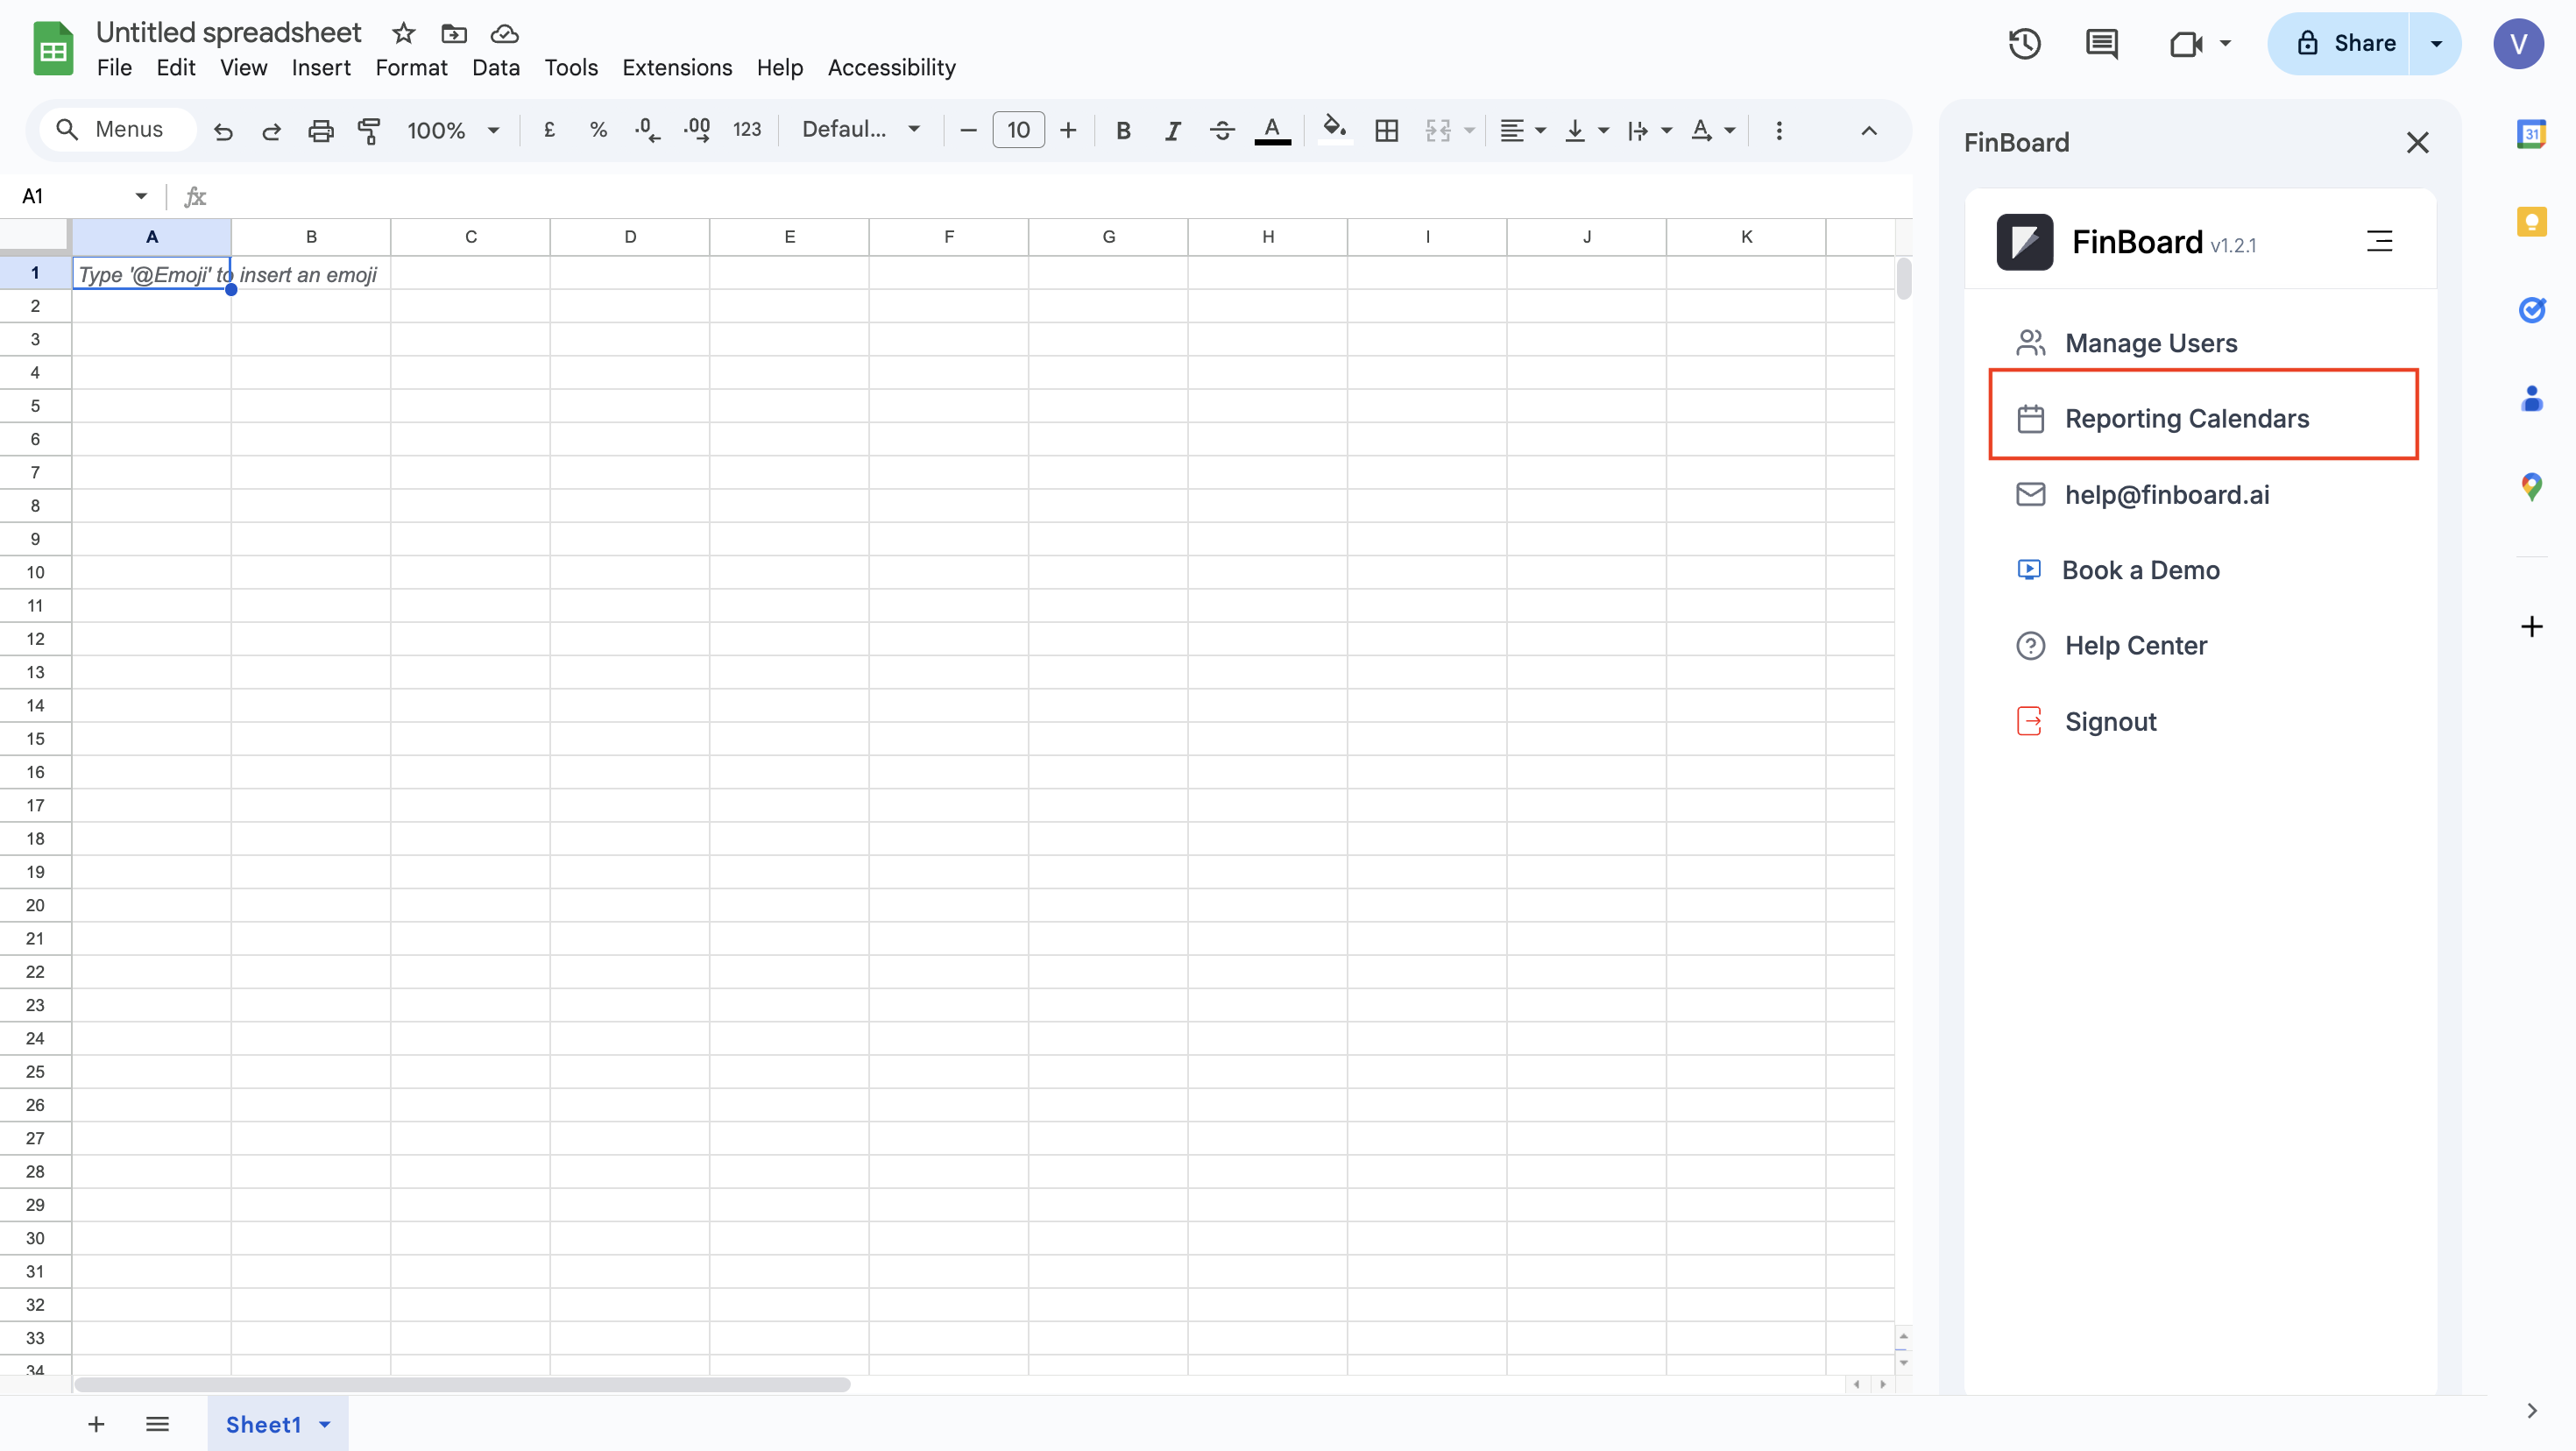
Step 2 — Go to Reporting Calendars
-
Click Reporting Calendars.
Step 3 — Open Calendar Management
-
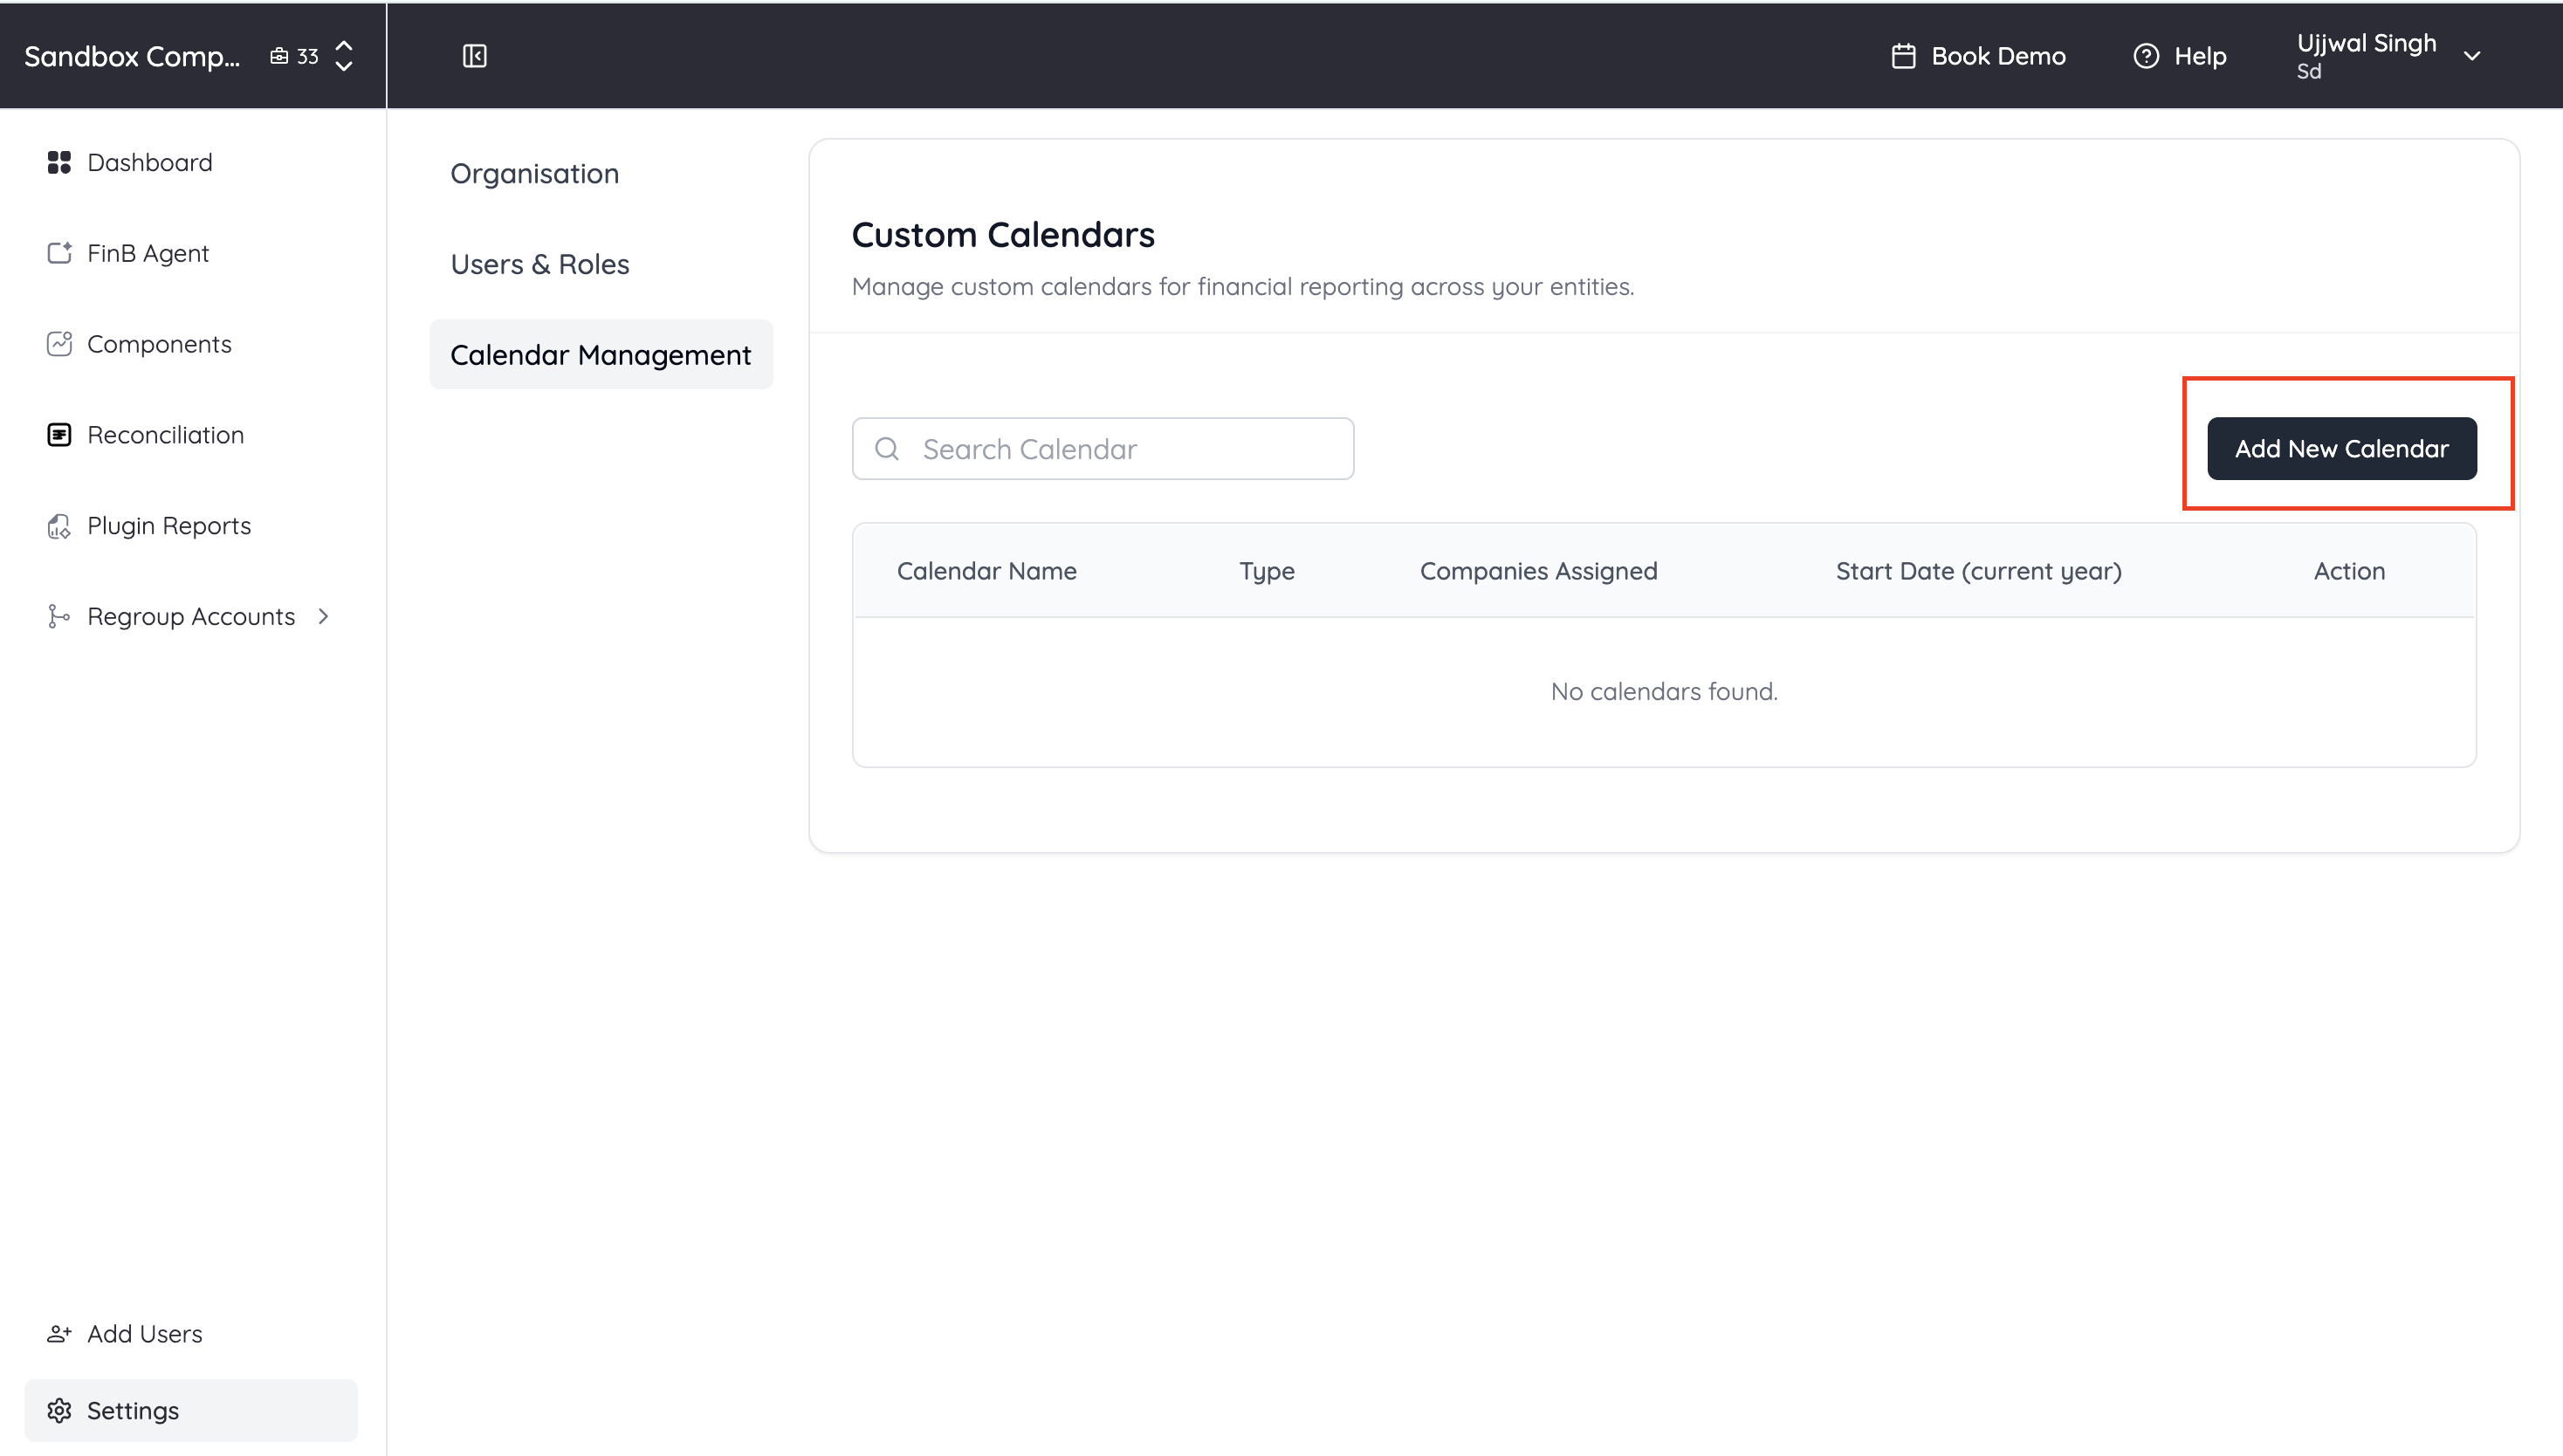
You will be taken to Settings → Calendar Management.
-
Click Add New Calendar to start the workflow.
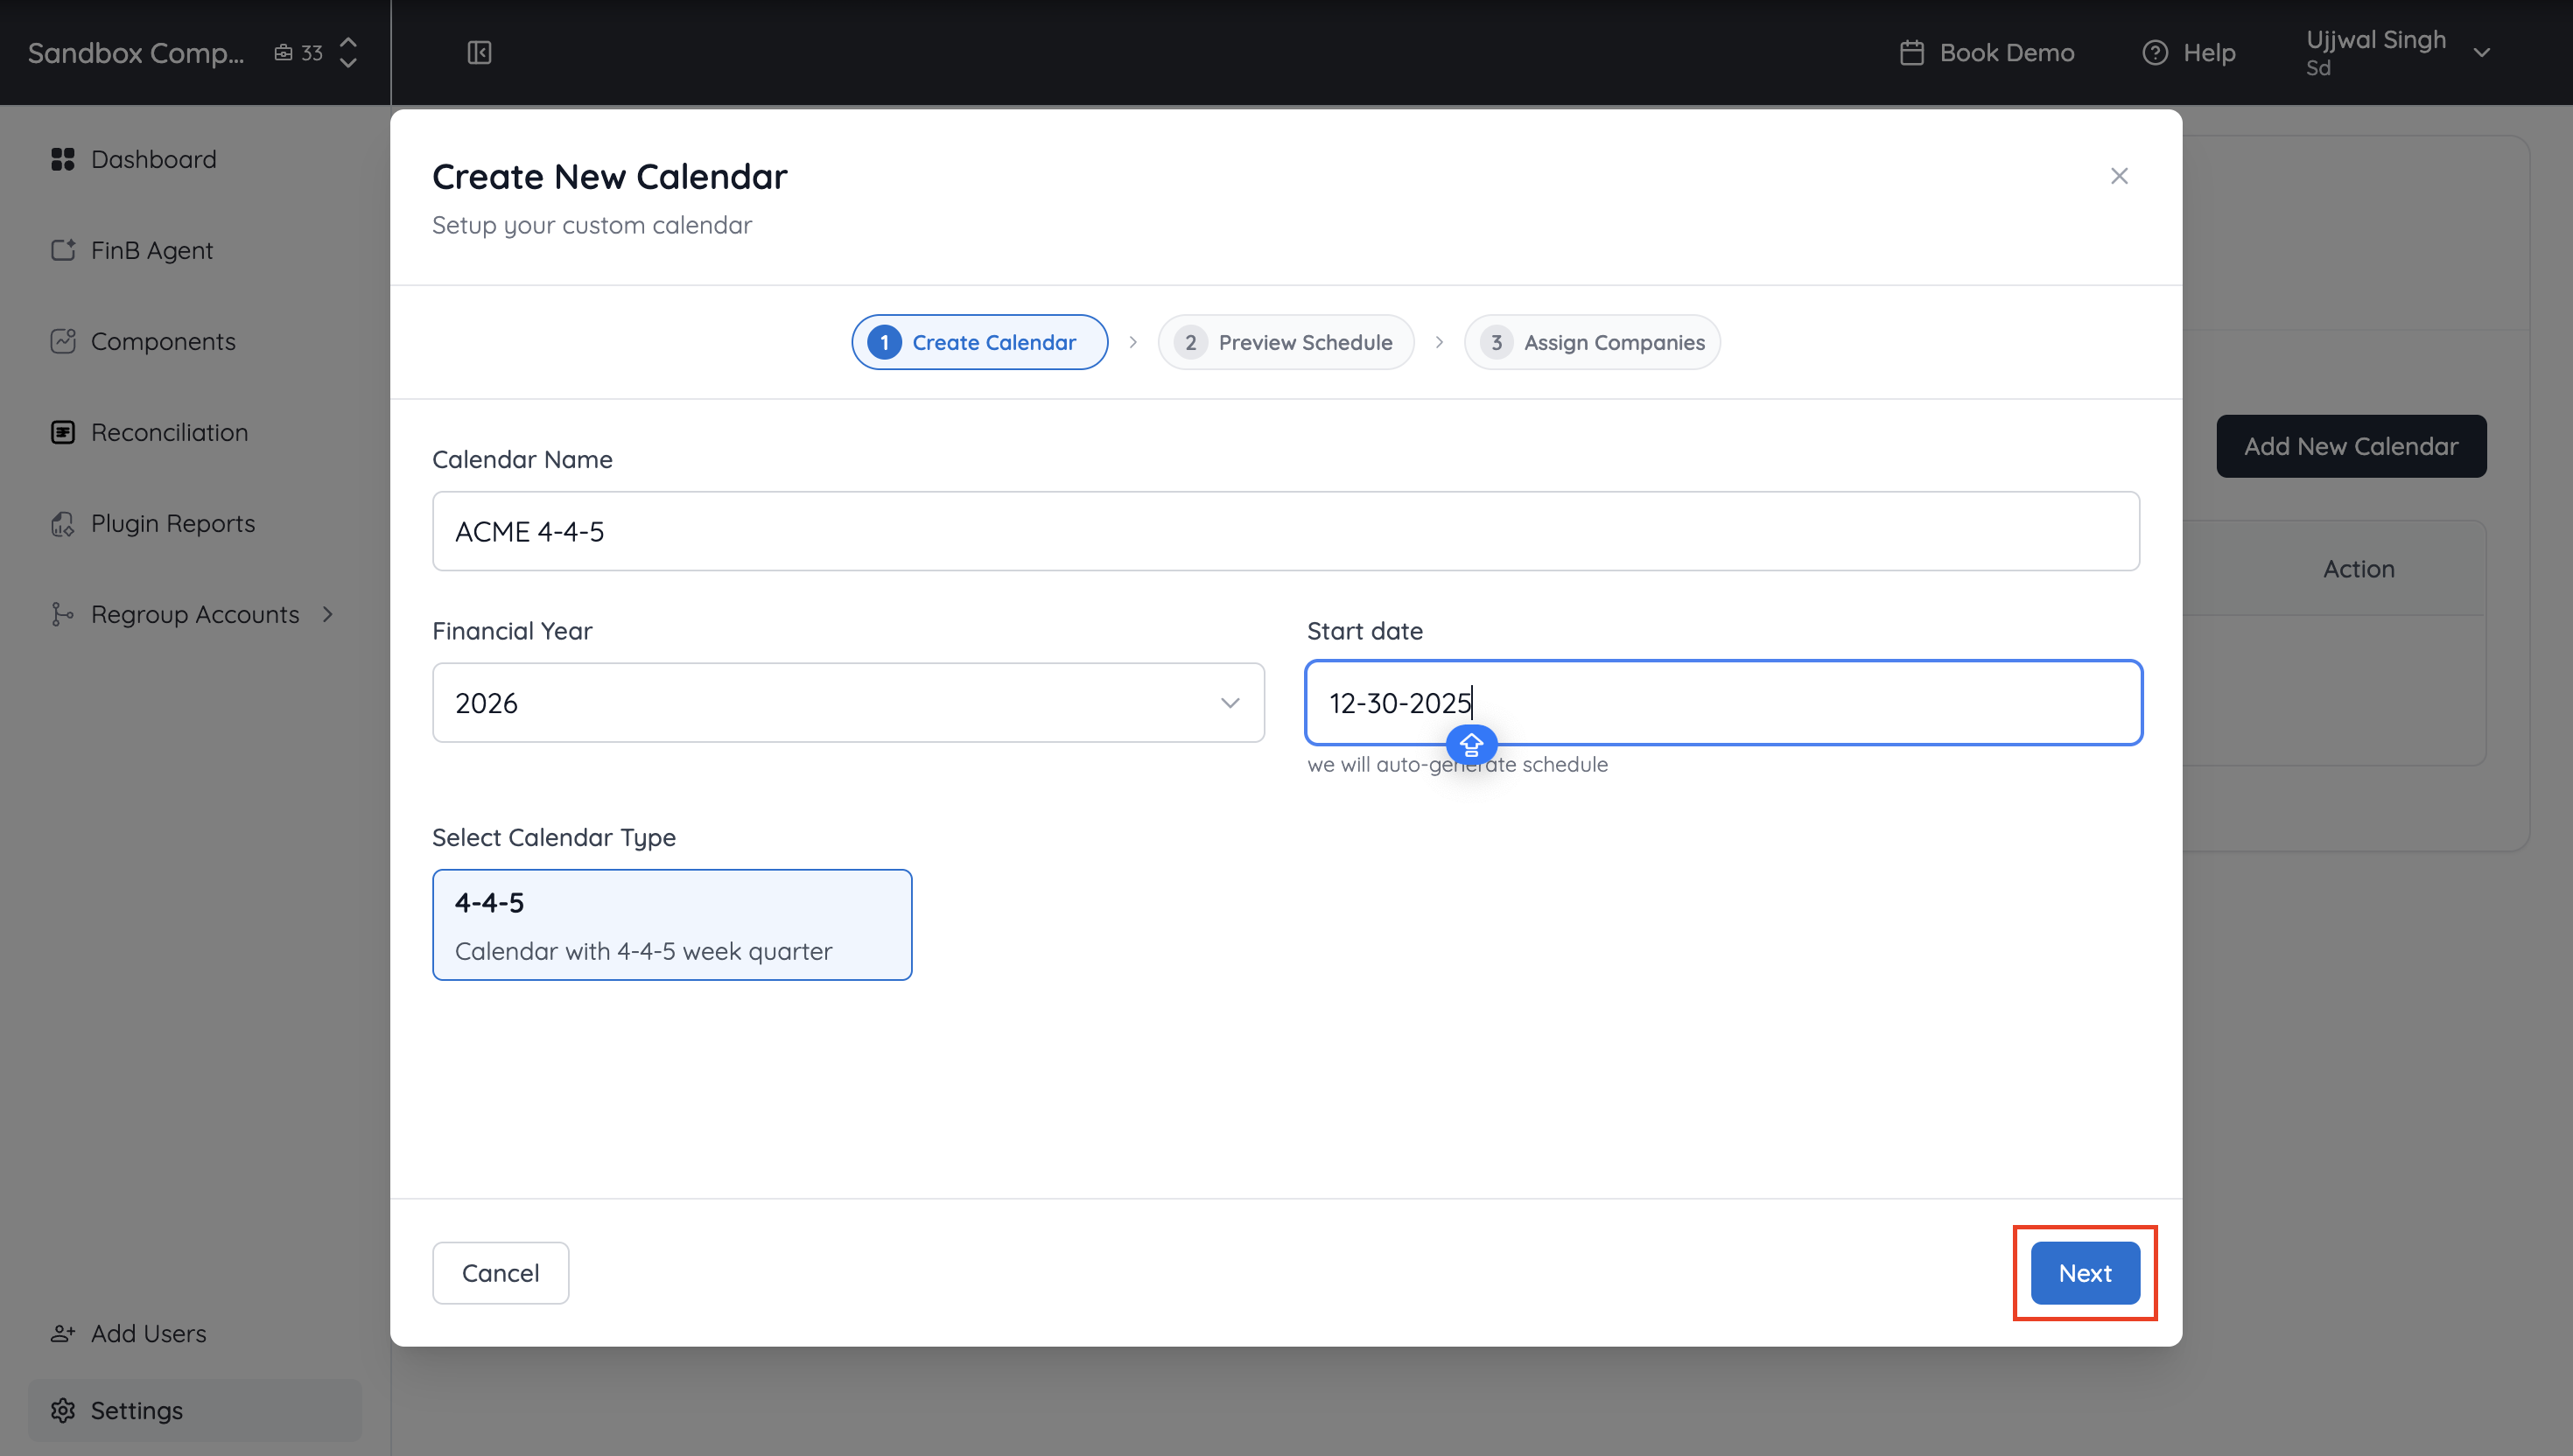
Step 4 — Enter calendar details
-
Provide the Display Name, Start Date, and Reporting Year.
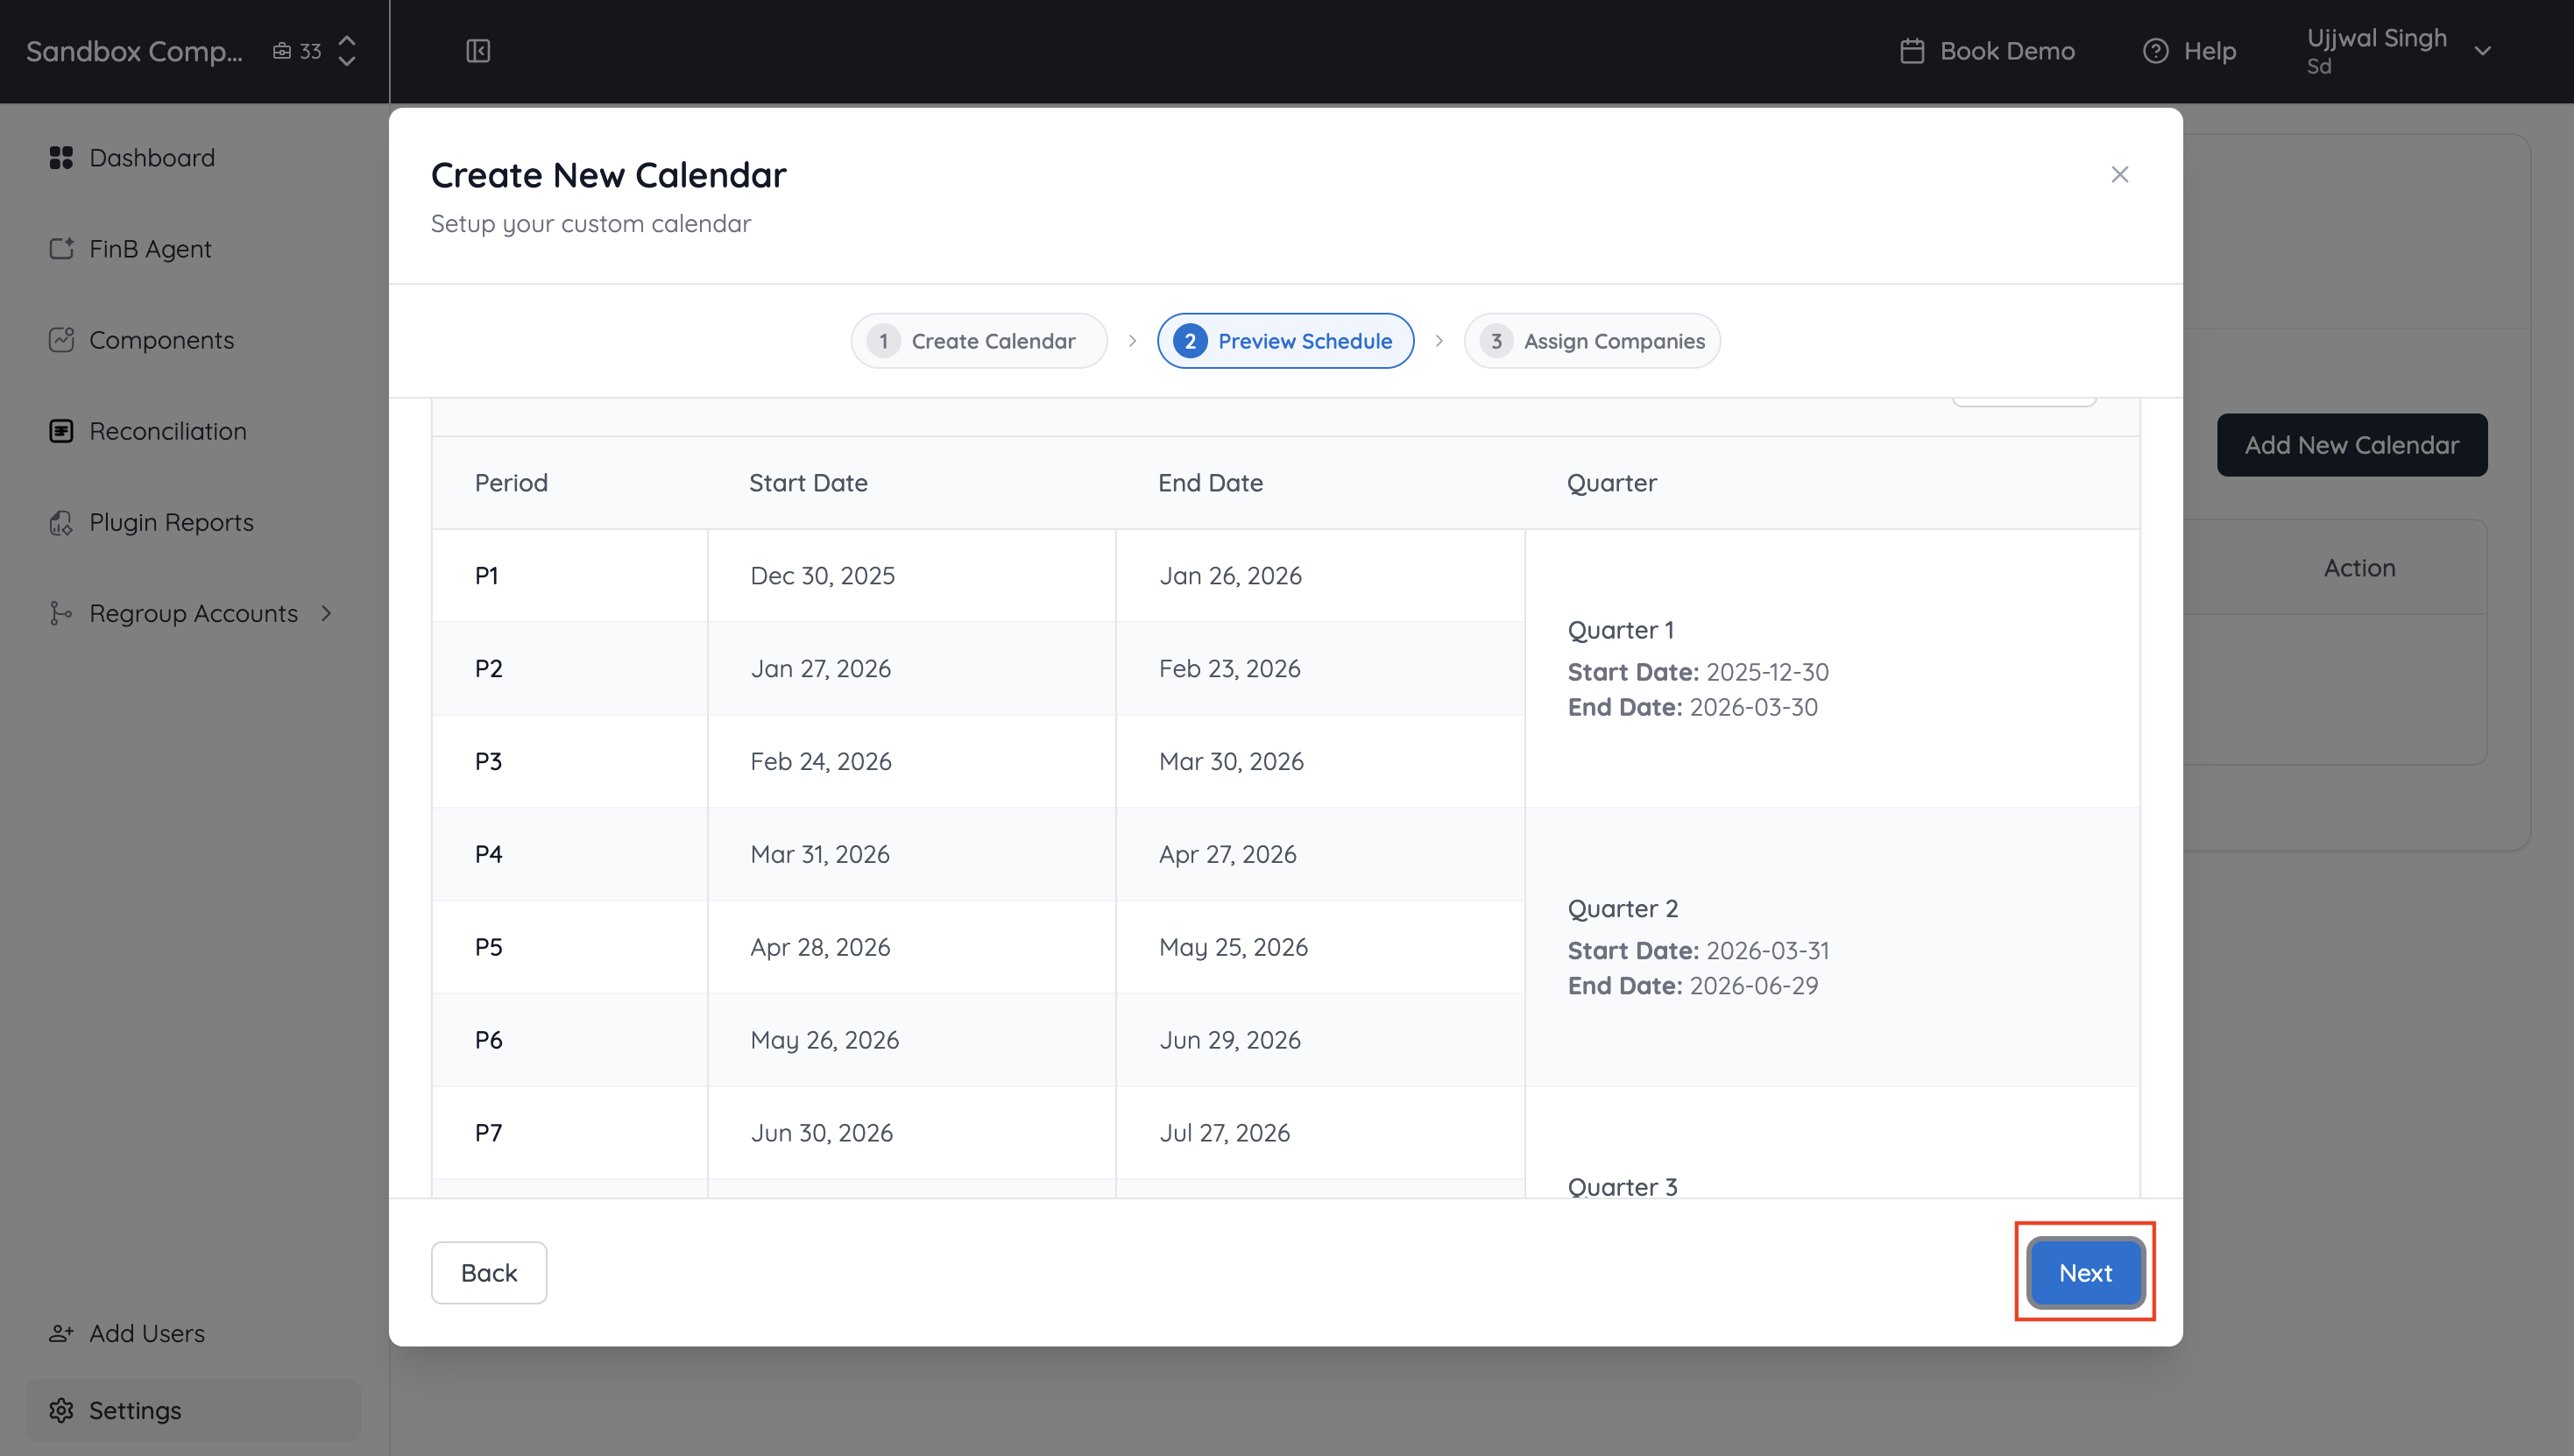
Step 5 — Review the generated schedule
-
FinBoard will automatically generate the schedule based on your entries.
-
Review the schedule and confirm.
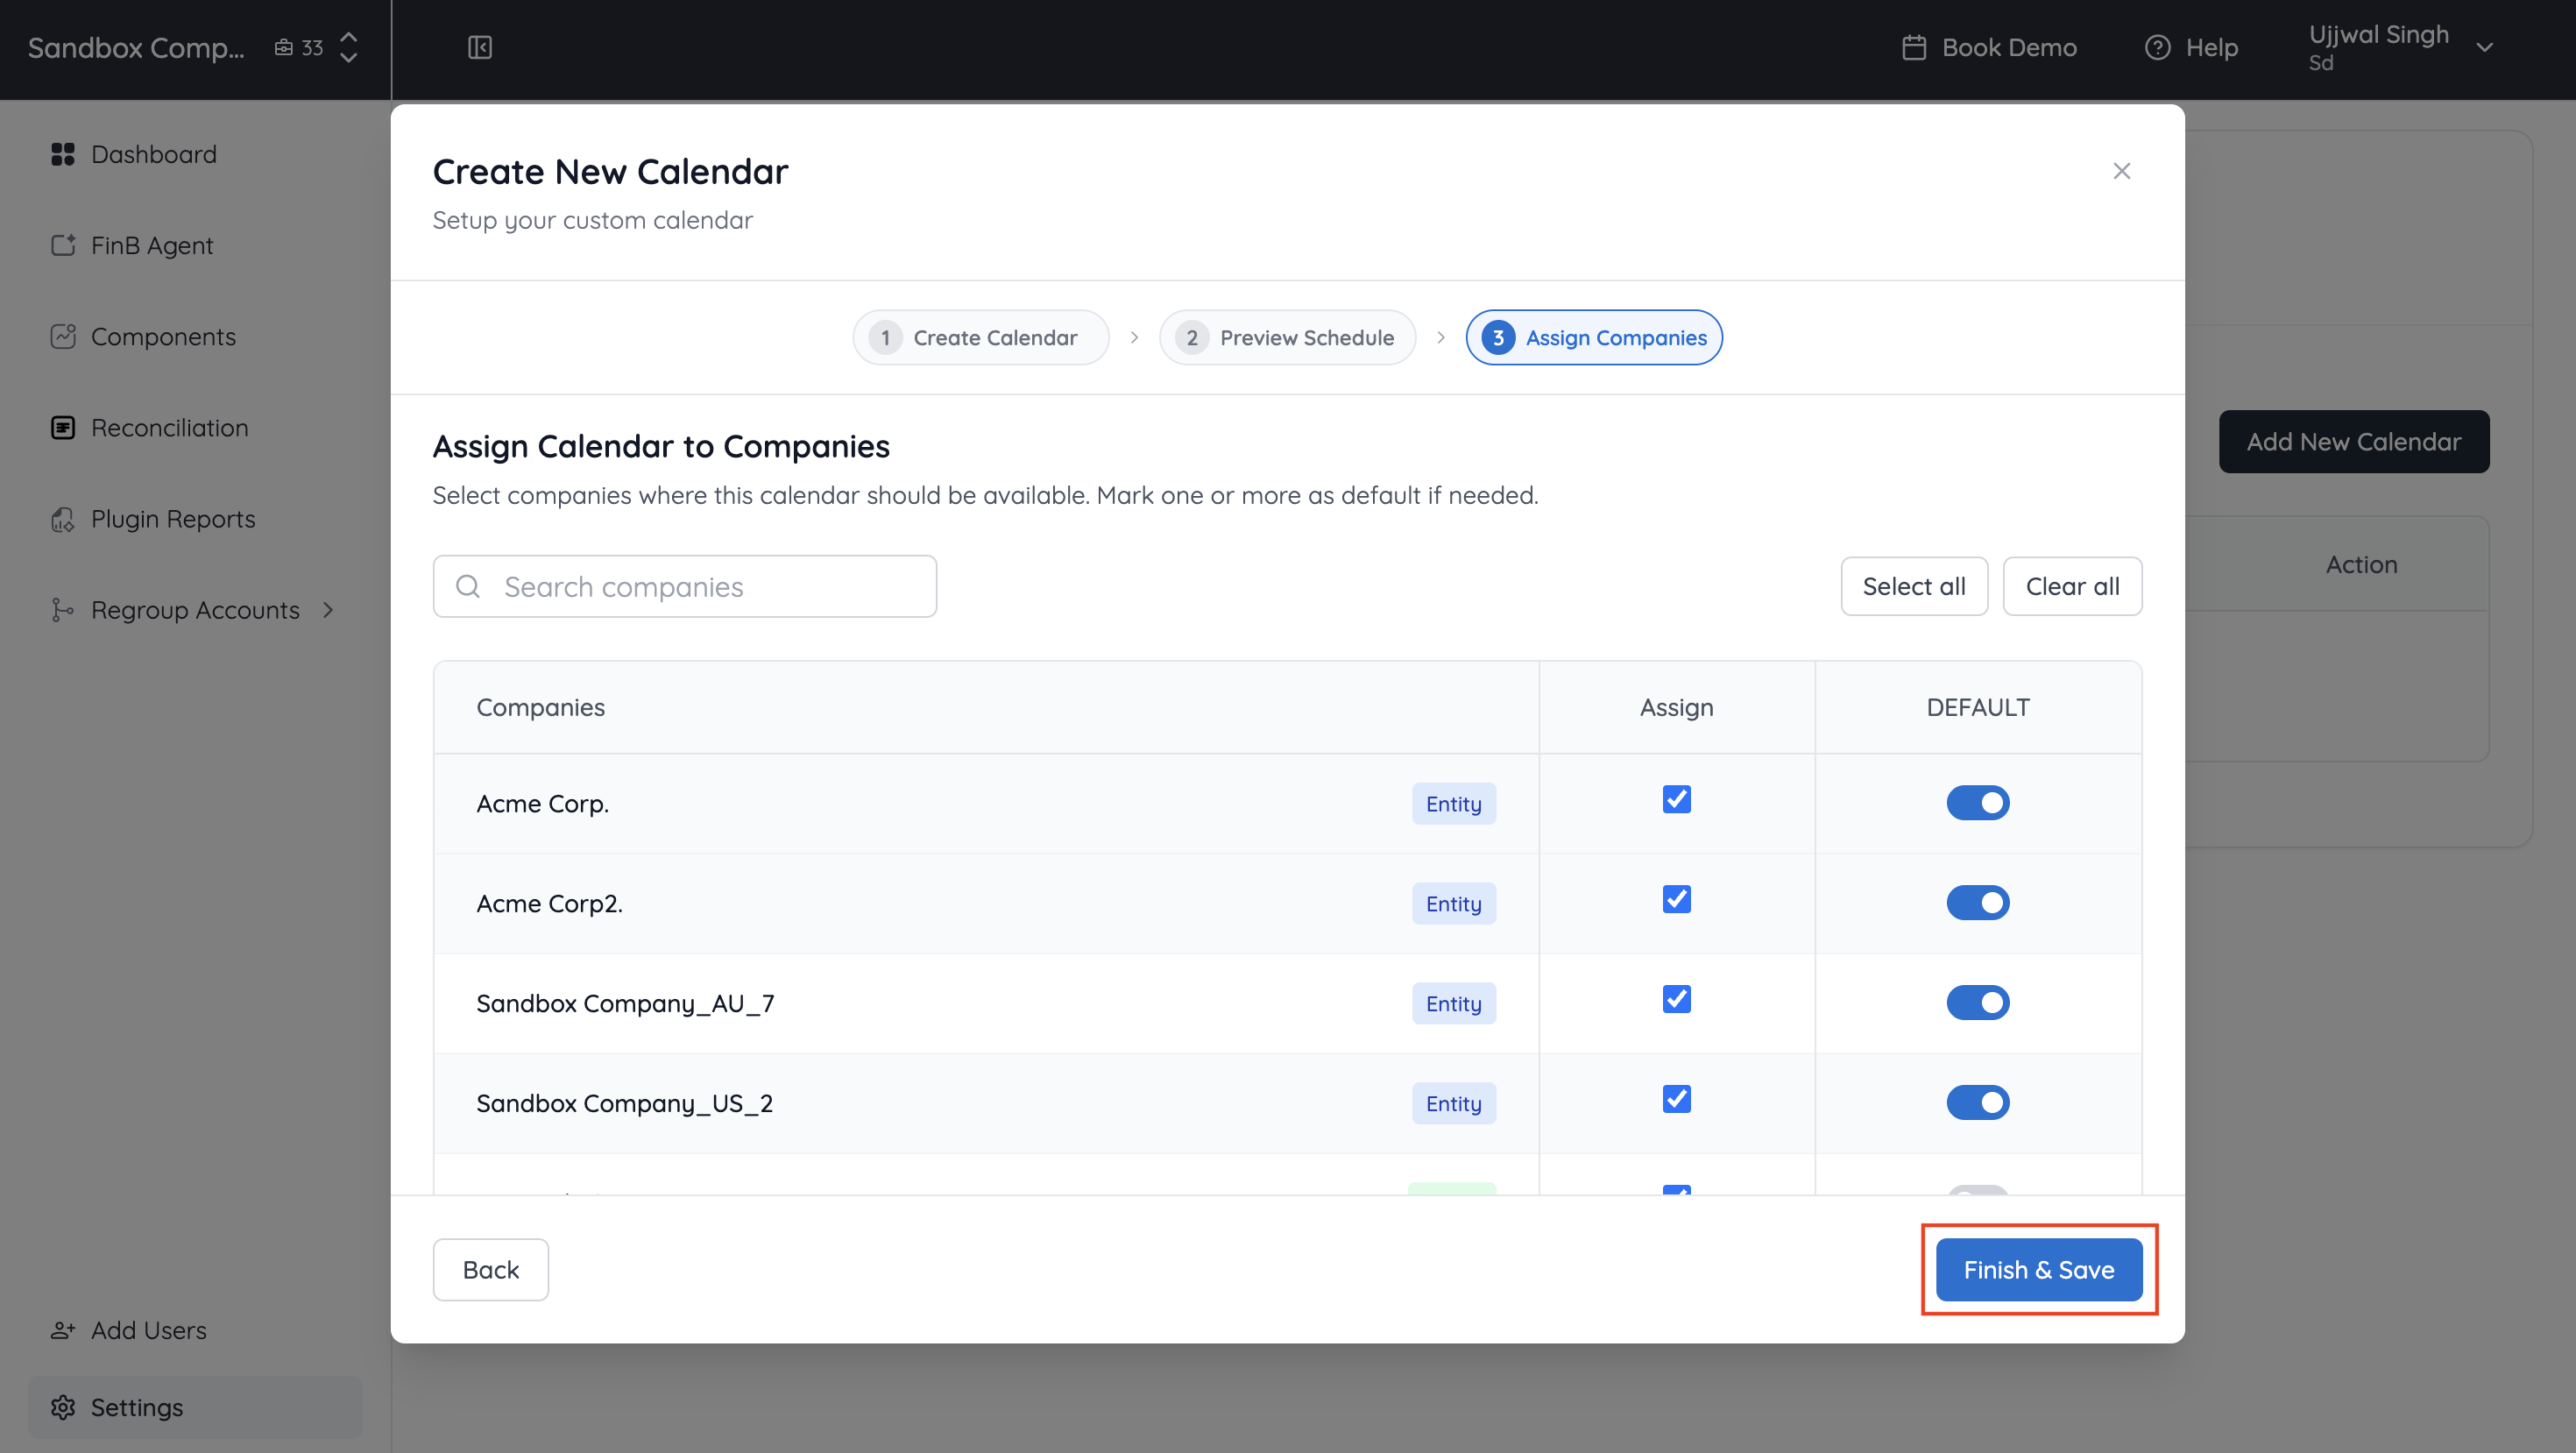
Step 6 — Assign companies and set default
-
Assign one or more companies to this calendar.
-
(Optional) Mark it as the Default calendar for the selected companies during report creation.
You will always be able to switch calendars while creating a report.
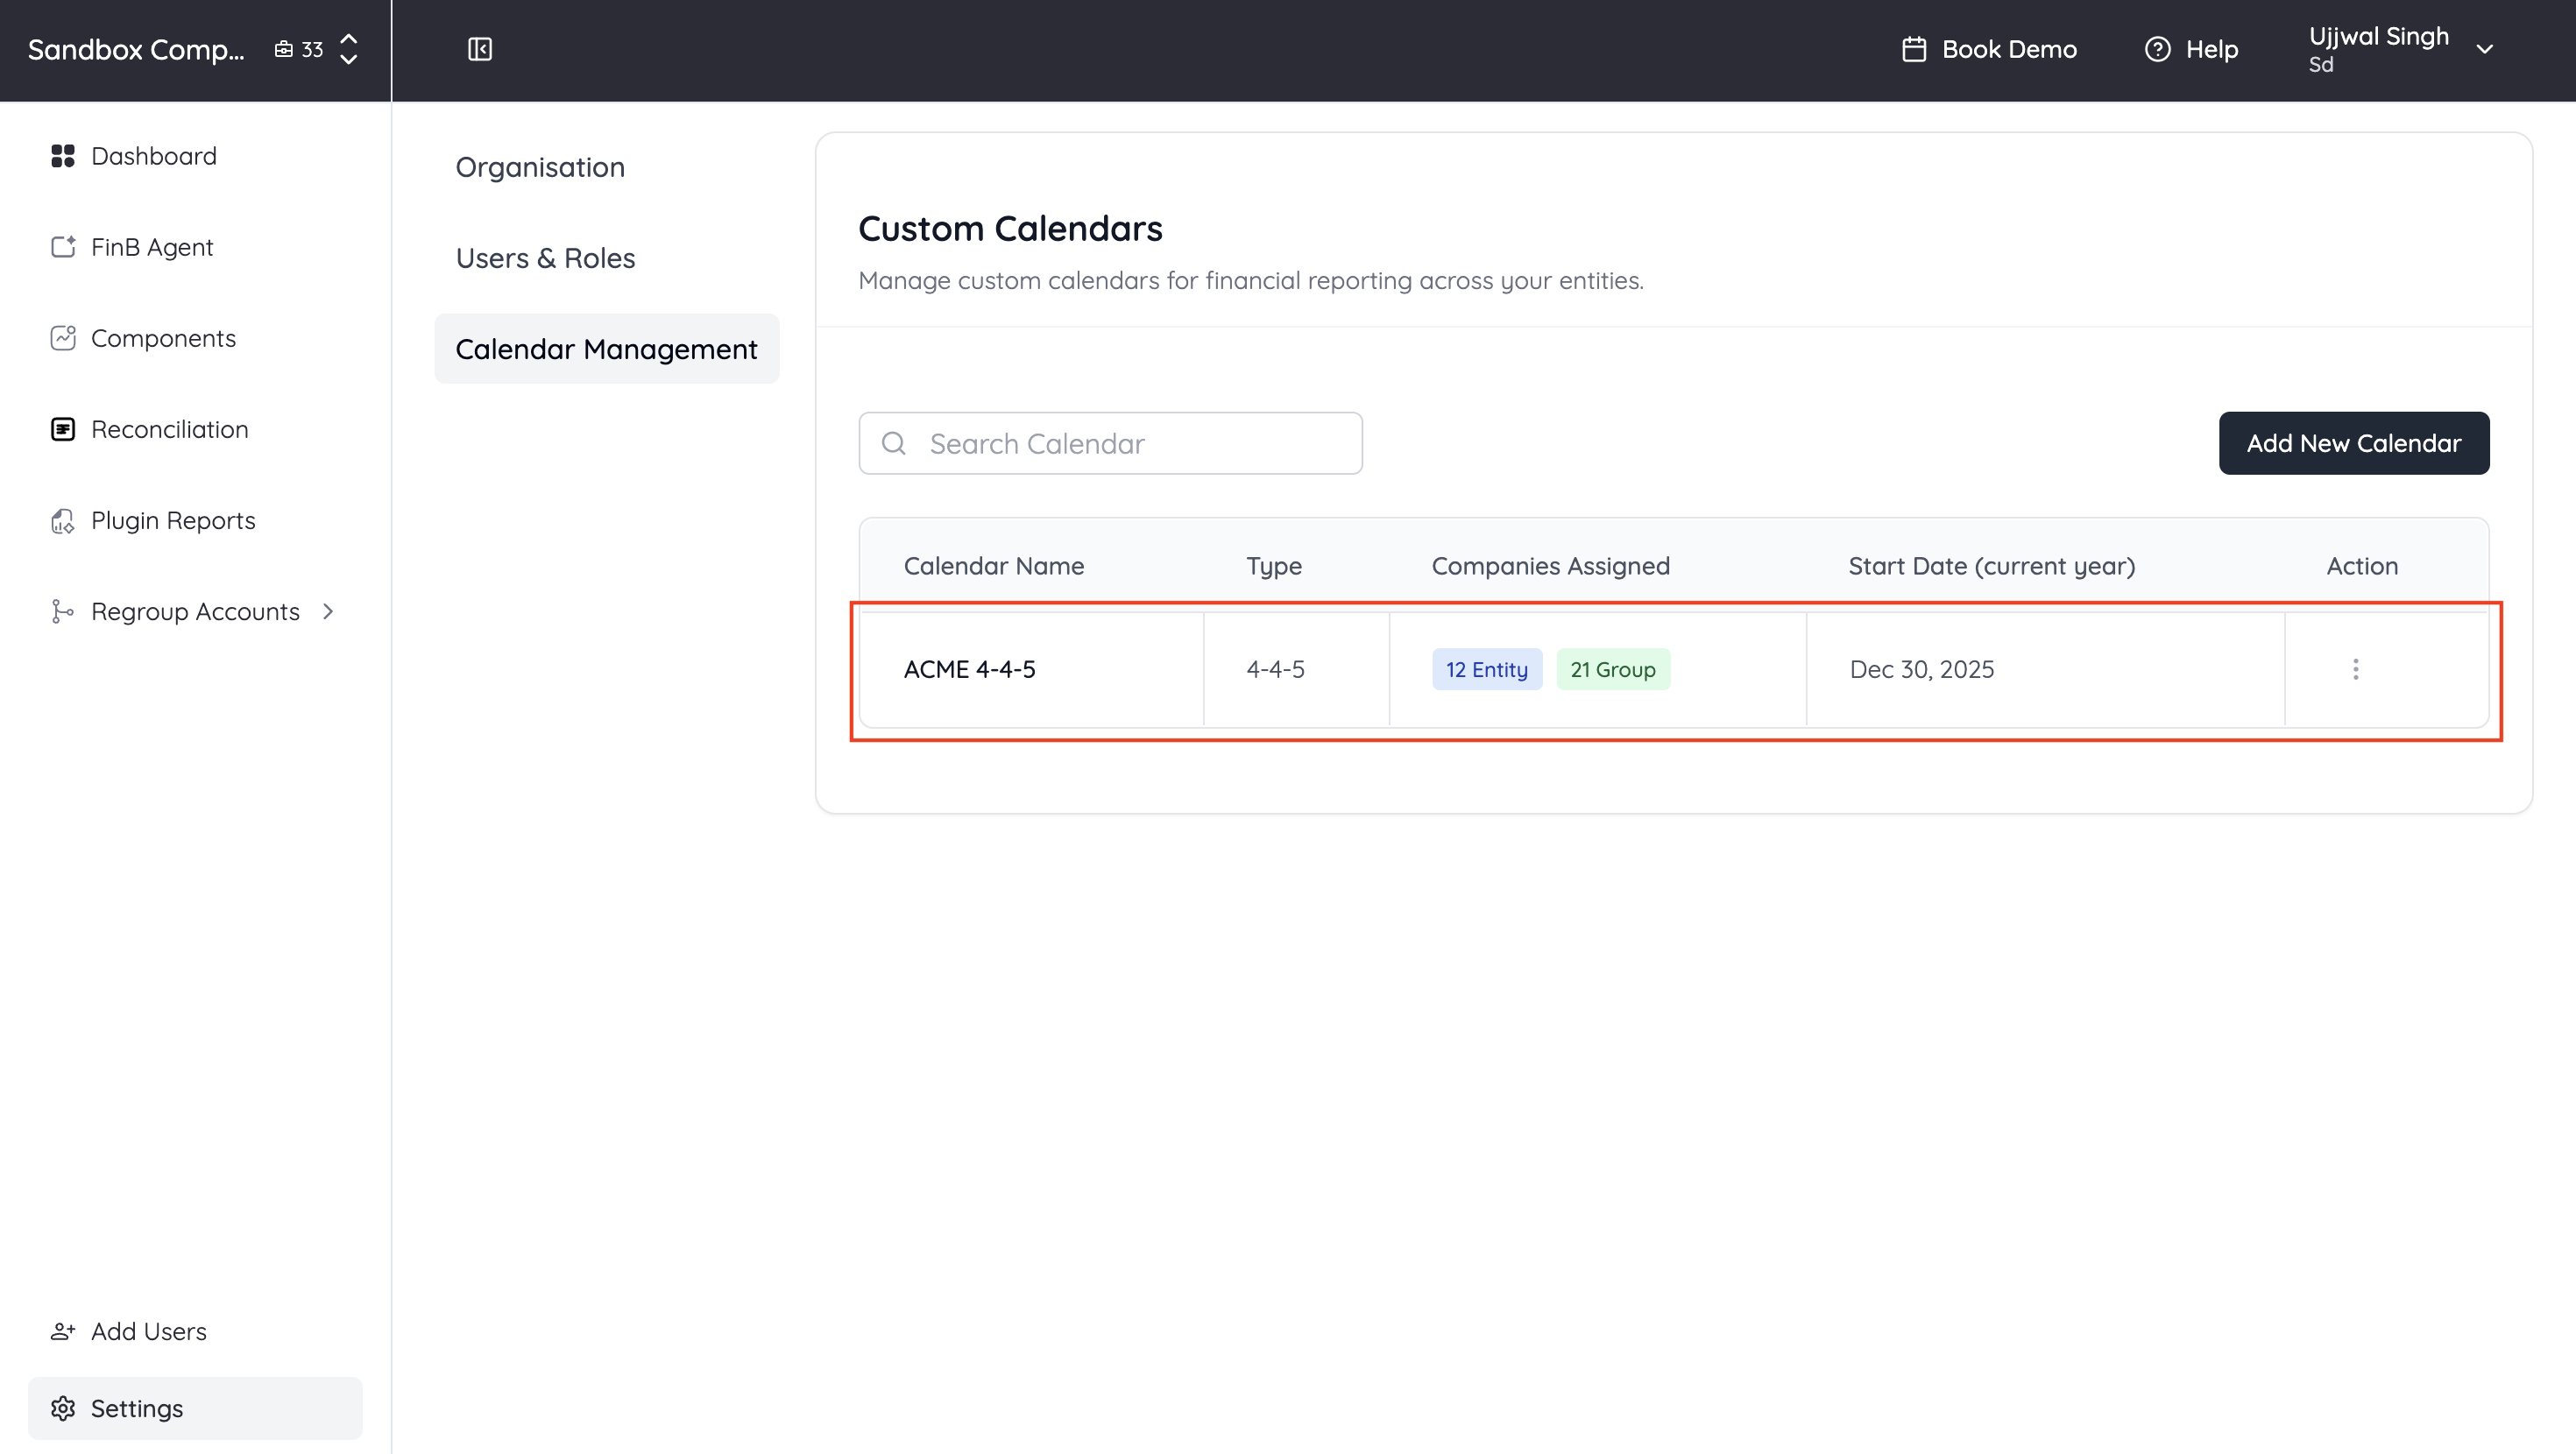
Step 7 — Save and review
-
The calendar is created and assigned to the selected companies.
-
Click the calendar to view its details.
Step 8 — Edit details (when appropriate)
-
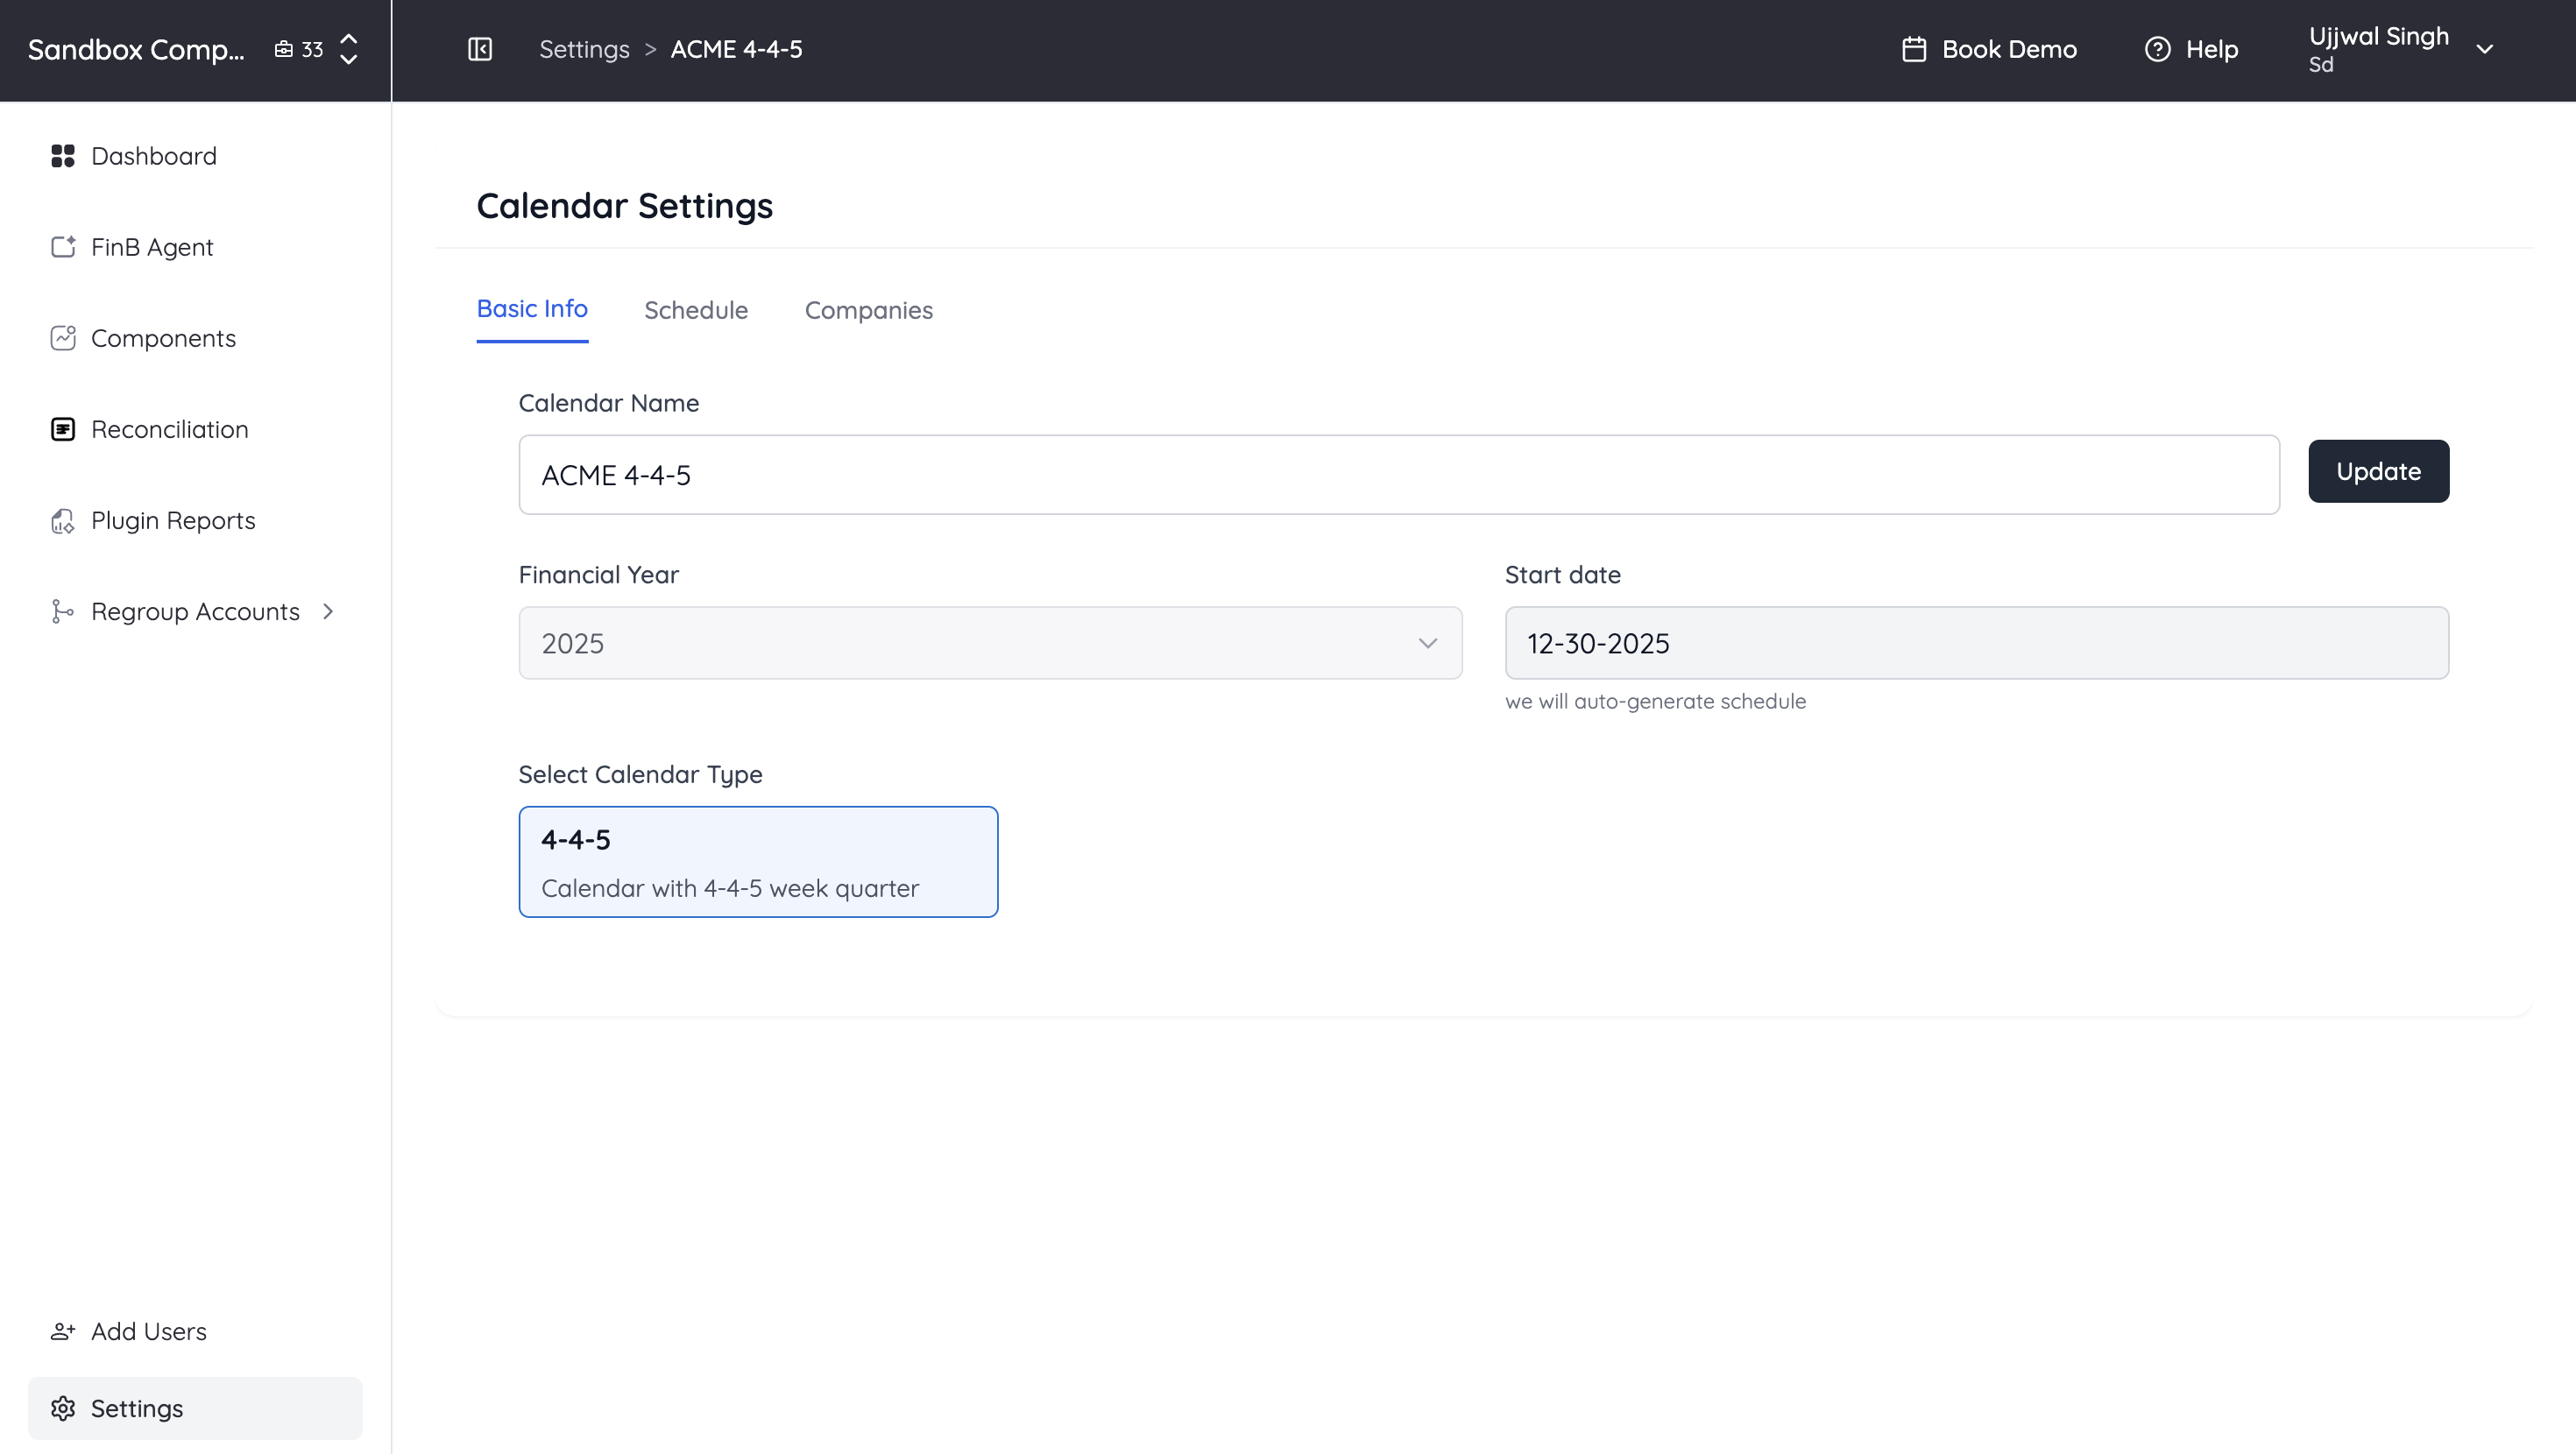
You can update the calendar name and assigned companies at any time.
-
If you need to change the Start Date or Reporting Year, create a new calendar to preserve historical consistency.
Step 9 — Use the calendar in a report
-
Open the FinBoard extension.
-
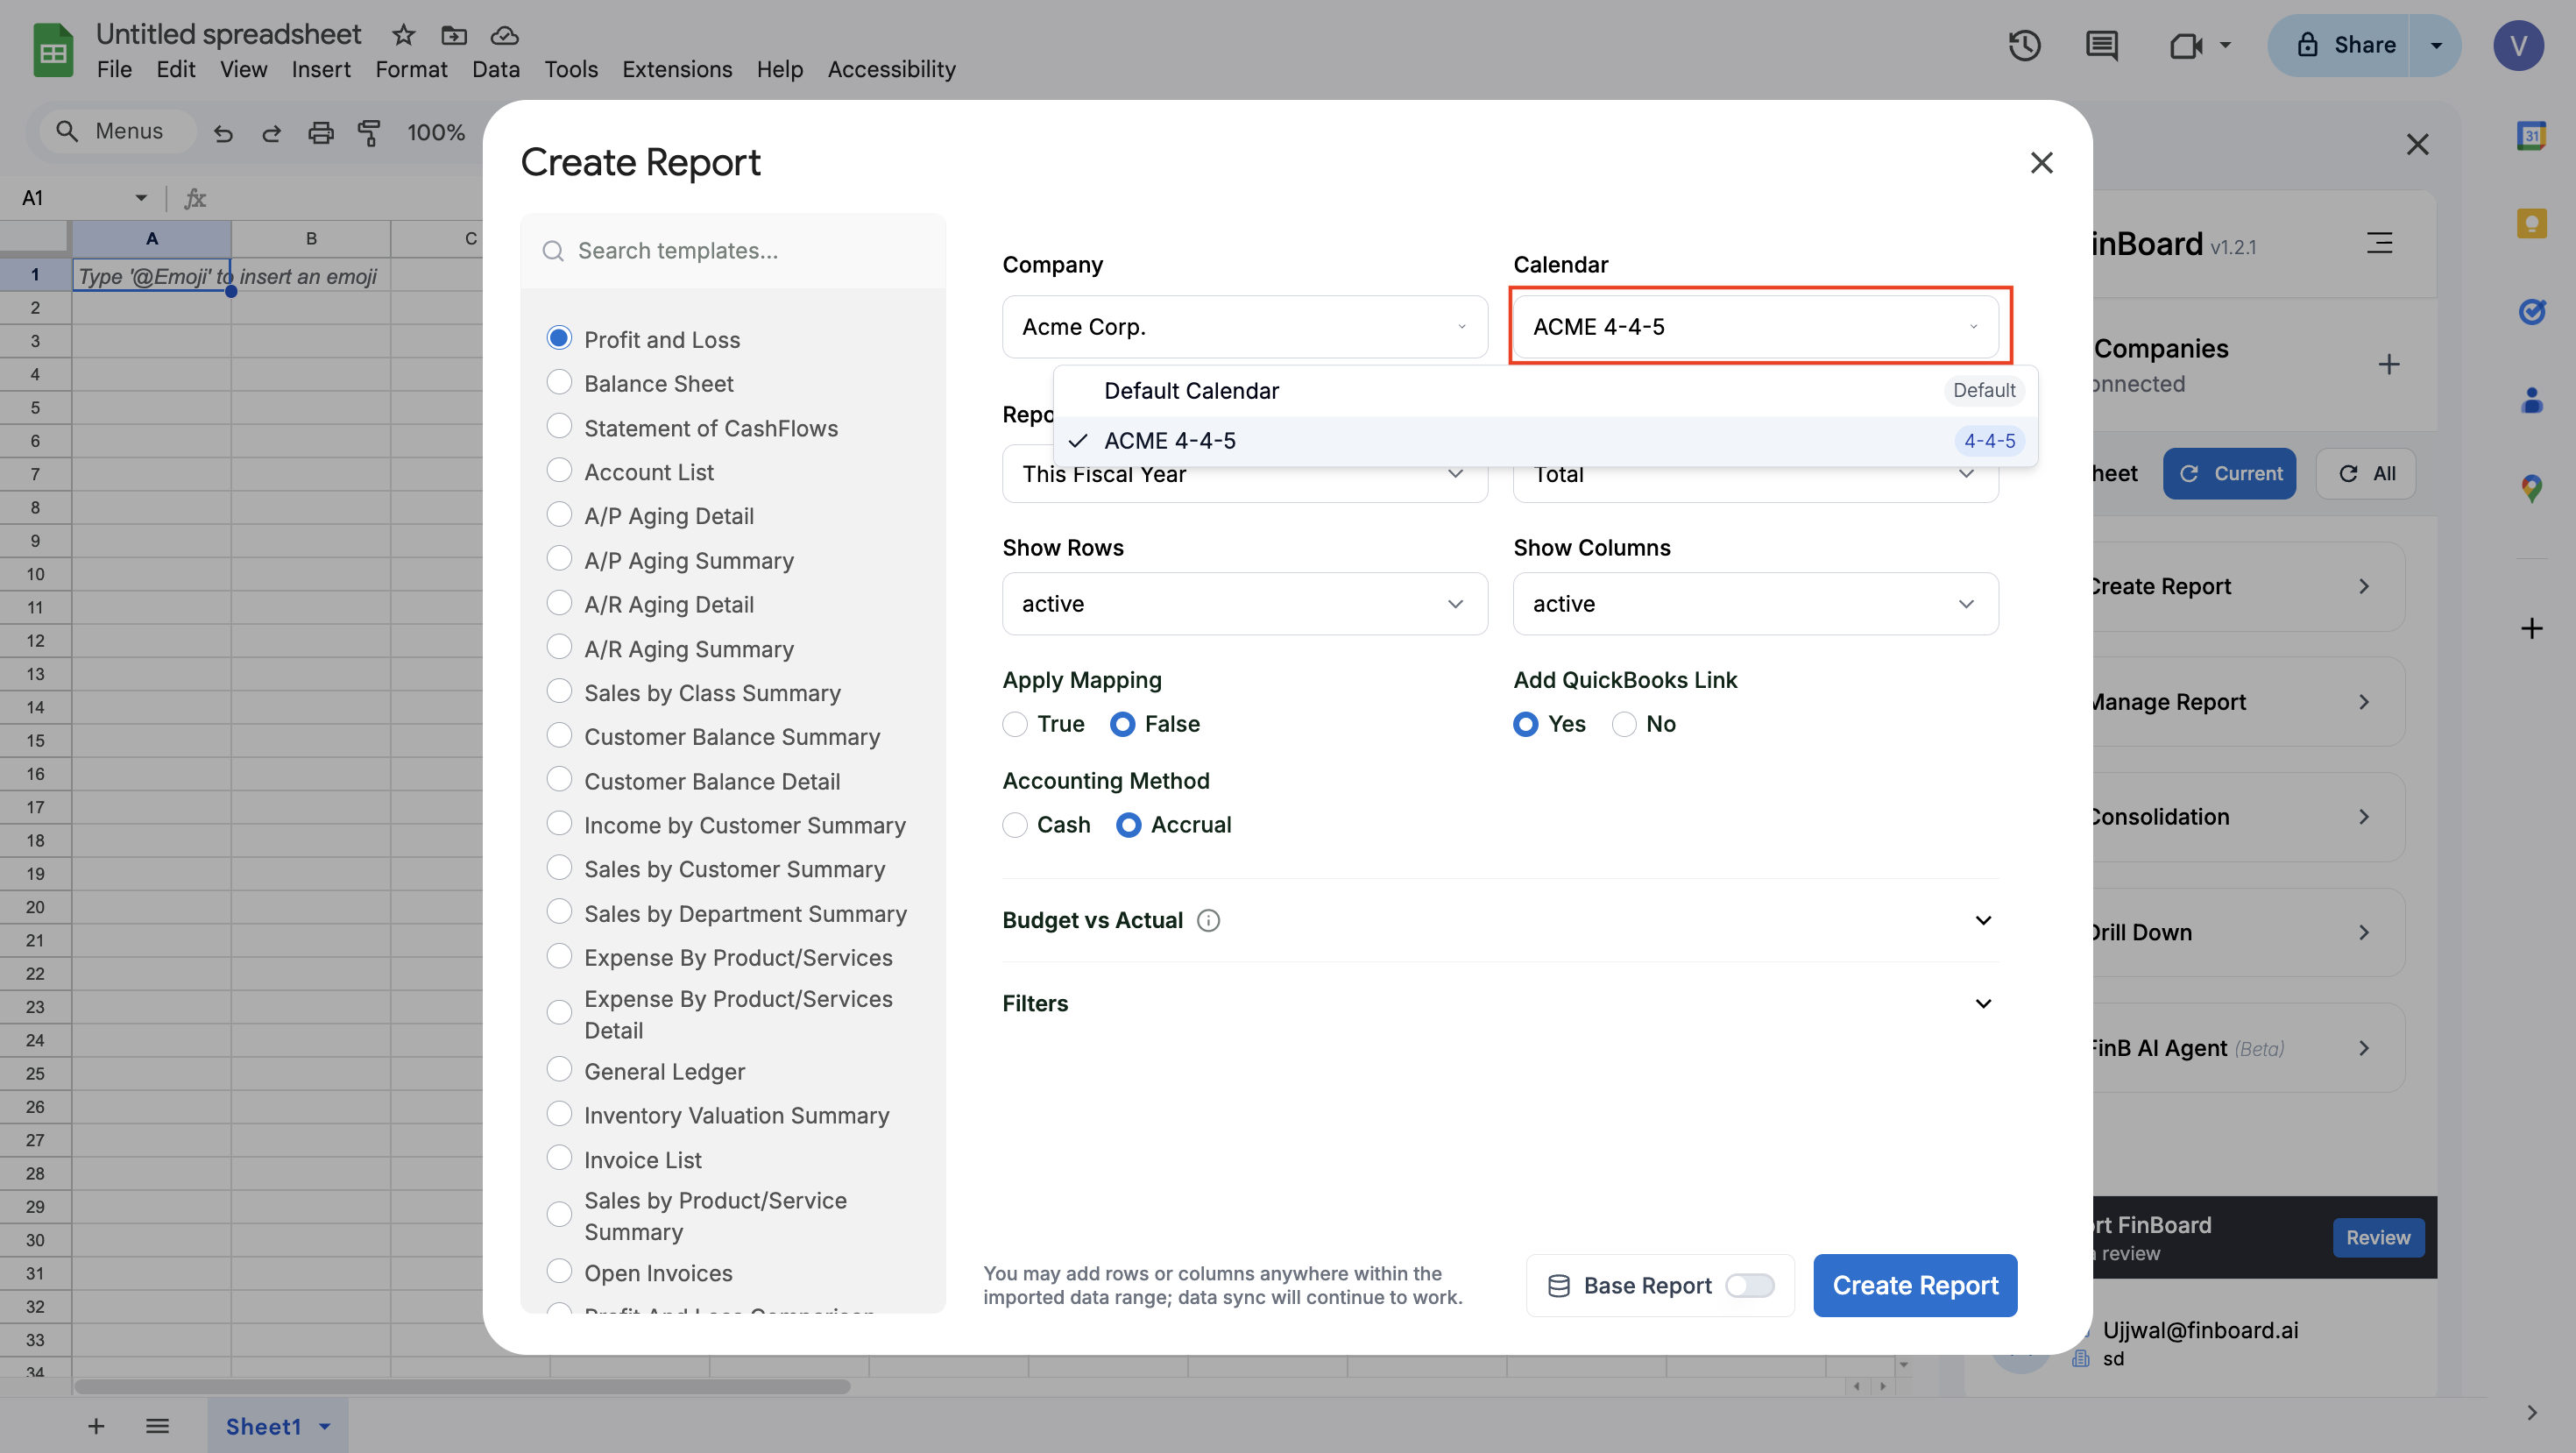
Click Create Report and select a company.
-
If a calendar is assigned to that company, it will appear in the Report Creation form as a selectable option.